How to backup multiple SQL Server databases automatically
In situations with few databases, maintaining the regular backup routine can be achieved easily, either with the help of a few simple scripts, or by configuring a SQL Server agent job that will perform the backup automatically. However, if there are hundreds of databases to manage, backing up each database manually can prove to be quite time-consuming task. In this case, it would be useful to create a solution that would back up all, or multiple selected SQL Server databases automatically, on the regular basis. Furthermore, the solution must not impact the server performance, or cause any downtime.
There was a common misconception that some objects in the database get locked during backup operations, thus denying full access to the database. The misconception was based on the situations where some of the user transactions got blocked during the database backup operations. All backup operations in SQL Server are online operations and they are not supposed to cause locks on user objects. However, taking a database backup does take some system resources. Each database backup operation requires both disk reads and disk writes. This induces certain pressure to the IO subsystem, and if not configured correctly, can further cause timeouts for some user transactions. For example, backing up a database to the same disk drive where data files are located could cause the timeout errors, especially on the disk drives with low number of spindles. In this case, the system has to:
- Read and write to the database files for all user transactions
- Read the database files in order to create backup file
- Write the read data for the backup file to the same disk drive
In this article, three different ways of backing up multiple SQL databases will be demonstrated:
- creating a SQL Server agent job,
- configuring a maintenance plan
- and the solution provided by ApexSQL Backup schedules.
Writing T-SQL backup scripts
Before we start configuring a backup job for the SQL Server agent, it is necessary to create backup script that will be used for the job. There is an option to use common backup command with each database that needs to be backed up. In this case, the following script can be used:--Script 1: Backup selected databases only BACKUP DATABASE Database01 TO DISK = 'C:\Database01.BAK' BACKUP DATABASE Database02 TO DISK = 'C:\Database02.BAK' BACKUP DATABASE Database03 TO DISK = 'C:\Database03.BAK'
This script is quite simple but it contains hard coded names for the backup files. The script can be used for the one-time jobs, but as soon as it is included in a regular schedule, the old backup files will simply be overwritten by the new ones. The most elegant way to prevent this situation, is to include the creation date in the backup filename. This can be easily achieved with the dynamic T-SQL script:
--Script 2: Include creation date in backup filenames

--1. Variable declaration

DECLARE @BackupFileName varchar(1000)

--2. Specifying backup path and filename

SELECT @BackupFileName = (SELECT ' E:\Backup\AdventureWorks2008_' +
convert(varchar(500),GetDate(),112) + '.bak')

--3. Executing the backup command

BACKUP DATABASE AdventureWorks2008 TO DISK=@BackupFileName

--4. Repeat steps 2. and 3. for all other databases

SELECT @BackupFileName = (SELECT ' E:\Backup\AdventureWorks2012_' +
convert(varchar(500),GetDate(),112) + '.bak')

BACKUP DATABASE AdventureWorks2012 TO DISK=@BackupFileName

SELECT @BackupFileName = (SELECT ' E:\Backup\AdventureWorks2014_' +
convert(varchar(500),GetDate(),112) + '.bak')

BACKUP DATABASE AdventureWorks2014 TO DISK=@BackupFileName
In the first step of the script, a variable for the backup file name is declared.
In step two, the BackupFileName variable is defined by combining strings for the backup path and database name with the string generated by the GetDate() function. The backup paths and the backup filenames must be provided for each database that needs to be backed up. In this example, databases AdventureWorks2008, AdventureWorks2012 and AdventureWorks2014 are used.
In step three, backup command for the specified database is executed. Steps 2 and 3 must be repeated for each other database that needs to be included in the backup job.
If there are too many databases on the server (a few hundred for example), and most of them need to be backed up, it would be impractical to apply the method used in script 2. Also, writing the script itself would take a a lot of time. To back up all databases on the server, with the possibility to exclude system (or any specific database), script 3 can be used. One of the greatest advantages of this script is that it will always back up all non-system databases on the server, even those databases that are added to the server after the agent job creation.
--Script 3: Backup all non-system databases

--1. Variable declaration

DECLARE @path VARCHAR(500)
DECLARE @name VARCHAR(500)
DECLARE @filename VARCHAR(256)
DECLARE @time DATETIME
DECLARE @year VARCHAR(4)
DECLARE @month VARCHAR(2)
DECLARE @day VARCHAR(2)
DECLARE @hour VARCHAR(2)
DECLARE @minute VARCHAR(2)
DECLARE @second VARCHAR(2)

-- 2. Setting the backup path

SET @path = 'E:\Backup\'

 -- 3. Getting the time values

SELECT @time = GETDATE()
SELECT @year   = (SELECT CONVERT(VARCHAR(4), DATEPART(yy, @time)))
SELECT @month  = (SELECT CONVERT(VARCHAR(2), FORMAT(DATEPART(mm,@time),'00')))
SELECT @day    = (SELECT CONVERT(VARCHAR(2), FORMAT(DATEPART(dd,@time),'00')))
SELECT @hour   = (SELECT CONVERT(VARCHAR(2), FORMAT(DATEPART(hh,@time),'00')))
SELECT @minute = (SELECT CONVERT(VARCHAR(2), FORMAT(DATEPART(mi,@time),'00')))
SELECT @second = (SELECT CONVERT(VARCHAR(2), FORMAT(DATEPART(ss,@time),'00')))

-- 4. Defining cursor operations

DECLARE db_cursor CURSOR FOR
SELECT name
FROM master.dbo.sysdatabases
WHERE name NOT IN ('master','model','msdb','tempdb')  -- system databases are
excluded

--5. Initializing cursor operations

OPEN db_cursor
FETCH NEXT FROM db_cursor INTO @name

WHILE @@FETCH_STATUS = 0
BEGIN

-- 6. Defining the filename format

       SET @fileName = @path + @name + '_' + @year + @month + @day + @hour +
@minute + @second + '.BAK'
       BACKUP DATABASE @name TO DISK = @fileName


       FETCH NEXT FROM db_cursor INTO @name
END
CLOSE db_cursor
DEALLOCATE db_cursor
Script 3 uses separate string variables for year, month, day, hour, minute and second to create the unique name for each subsequent backup file. To apply this script in a specific environment, it is necessary to configure the following parameters in the script 3:
- Set the custom backup path in step 2
- In step 4, add names of the databases that should be excluded from the script. In this example, only four system databases are excluded.
- If needed, change the sequence of variables in step 6 to define the backup file name
Create SQL Server agent job
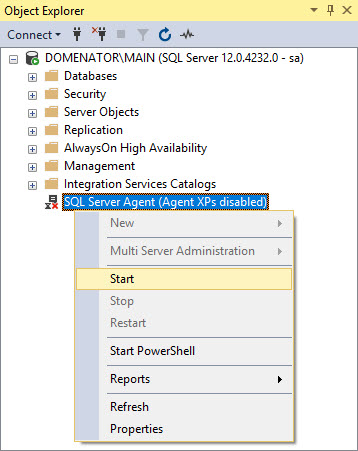
In order to create any SQL Server Agent job, make sure that SQL Server Agent is running first.Start SQL Server Management Studio, and locate the icon that represents SQL Server Agent at the bottom of the Object Explorer. If there is “Agent XPs disabled” message in parenthesis, the agent is not running. To start the SQL Server Agent, right click on its label, and select Start from the context menu.
As soon as agent is running, proceed with the following steps to configure the job:
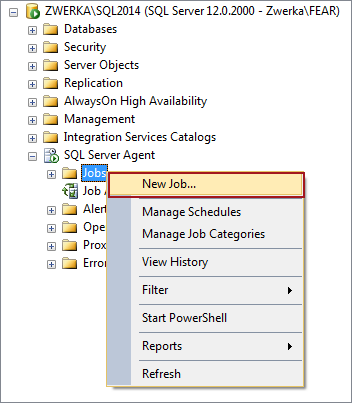
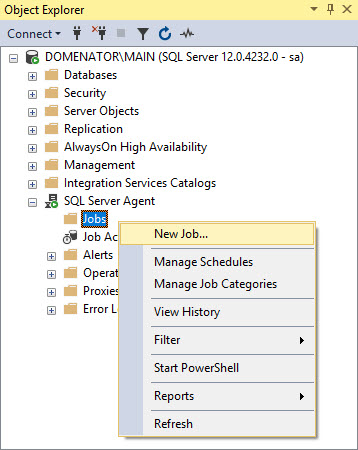
- Expand SQL Server Agent node in Object Explorer, right click on Jobs, and select New job… in the context menu.
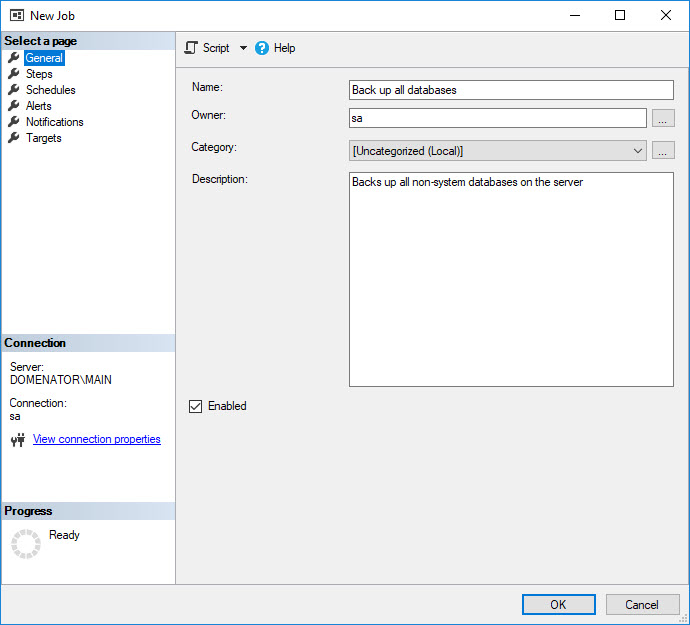
- In the General tab of the New Job form, provide the name, owner and description for the job. Since script 3 will be used for the agent job, Name and Description fields should describe situation where backups are taken for all databases on the server. If job needs to be active right after it is created, check the Enabled box.
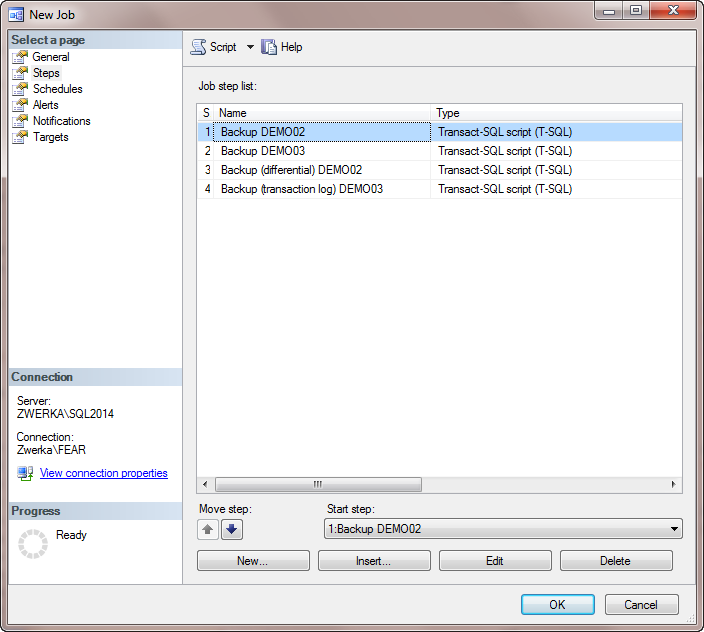
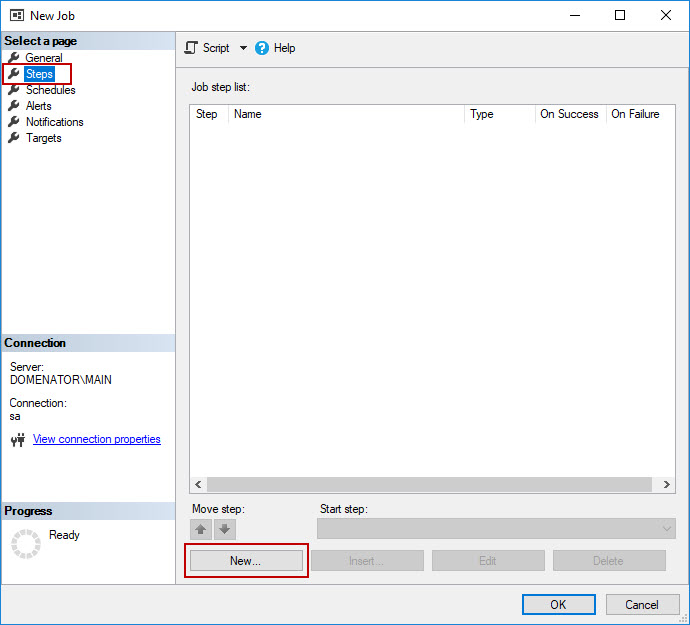
- In Steps tab, click on the New… button to configure job steps.
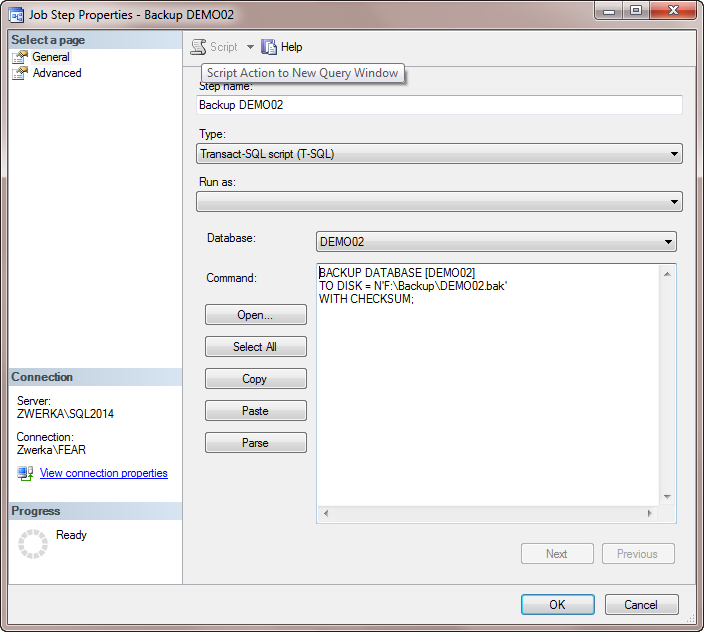
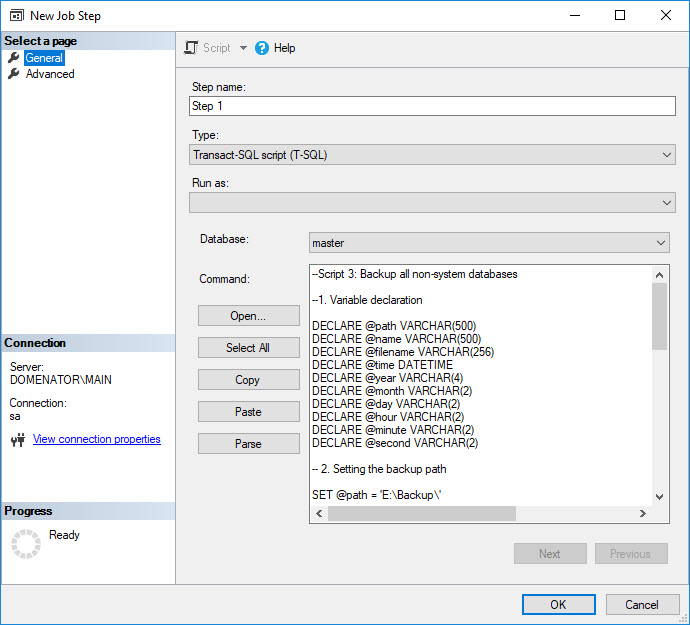
- In General tab of the New Job Step wizard, provide the step name, set the job type to Transact-SQL script (T-SQL), and select master database in the Database box. Paste the script that will be used for this job in the Command box. In this example, script 3 will be used. Click on OK button to save the job step.
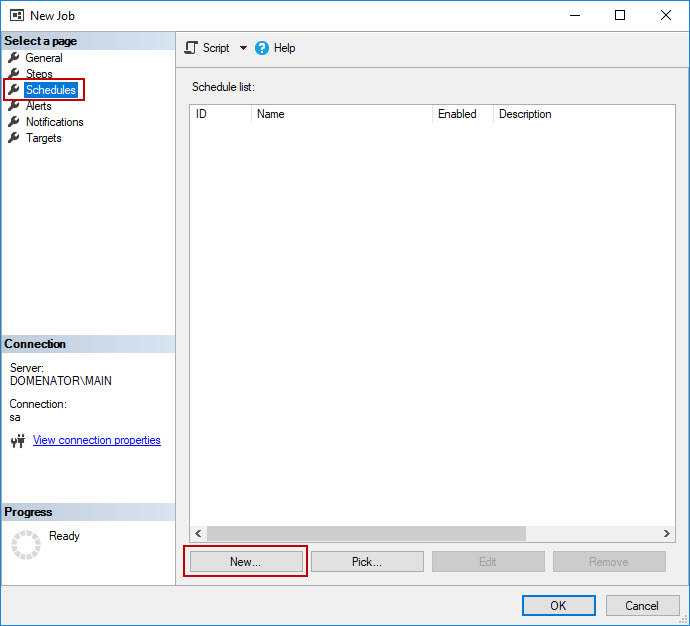
- Back in the New job wizard, select Schedules tab, and click on New… button.
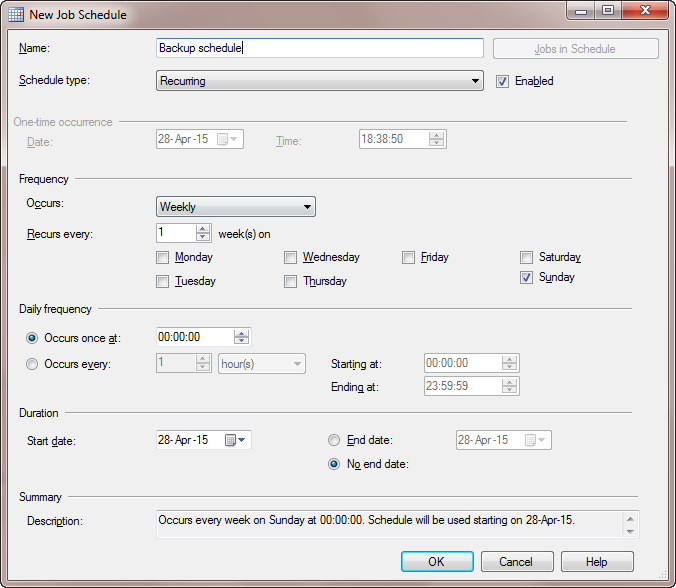
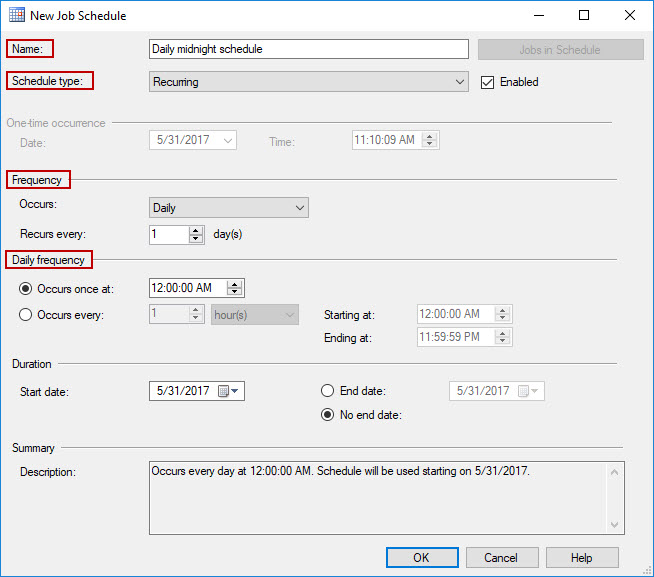
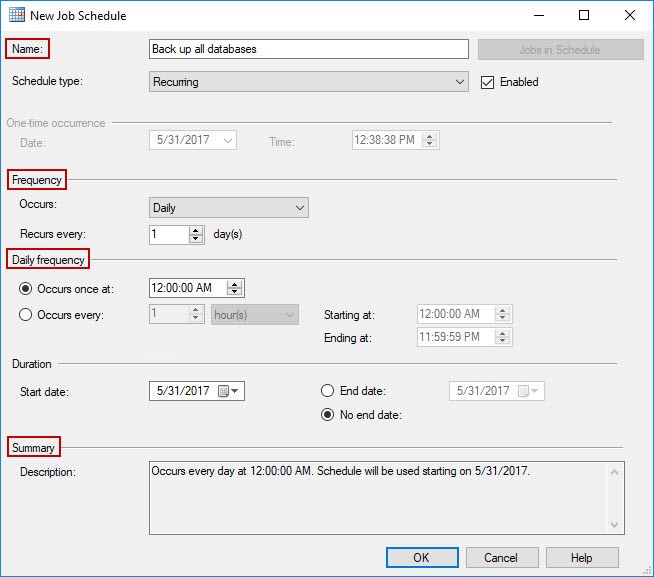
- In New Job Schedule window, set the name for the schedule, select the schedule type, and set the frequency. In this case, the schedule that runs at 12AM each day will be used. Click OK button to save changes.
- Optionally, set alerts and notifications in respective tabs of the New Job wizard, and click OK to complete agent job configuration.
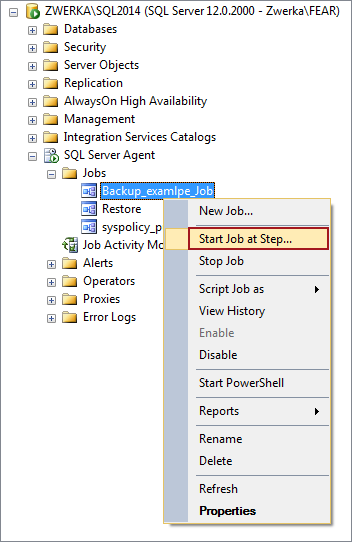
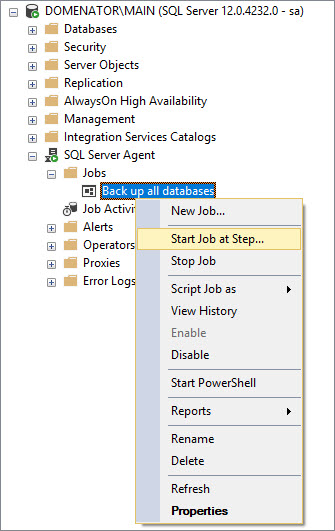
- The best way to check if the job is working, is to run it, and see the results. As mentioned in the introduction, avoid running this job during the high-traffic hours on the server. To run created jobs immediately, expand SQL Server Agent and Jobs nodes in Object Explorer, right click on the created job, and select Start job at step… option.
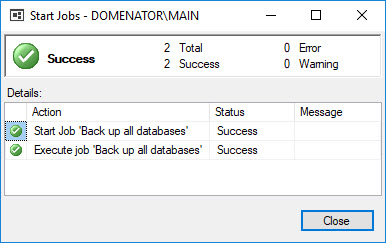
- Success message is displayed as soon as job is executed.
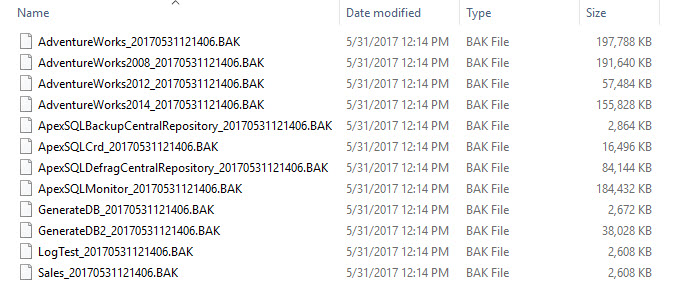
- Finally, check the backup folder for the created backup files. Since script 3 adds values for the exact time in seconds to all backup filenames, the job can be run all over again – and each new run will create set of new, separate backup files.
Create a maintenance plan to back up selected databases
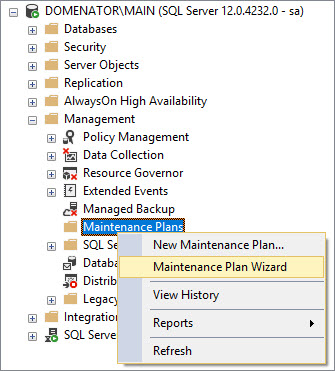
The same result can be achieved with the use of maintenance plans. One of the advantages of maintenance plans is that there is no need for the T-SQL scripts. To configure a maintenance plan, perform the following steps:- Expand Management node in Object Explorer, right click on Maintenance Plans, and select Maintenance Plan Wizard from the context menu.
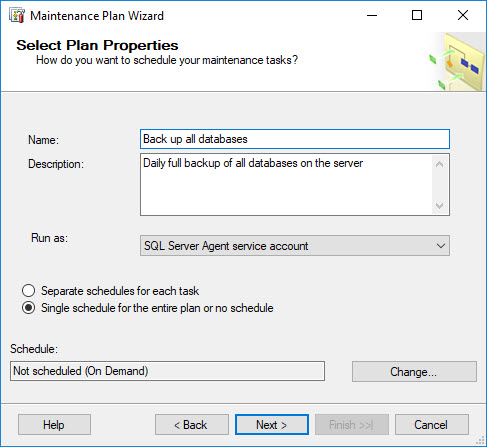
- In first step of the wizard, provide name and description for the maintenance plan. Check the option to use single schedule for the entire plan. Also, click on the Change… button to configure the schedule.
- In New Job Schedule window, specify name, schedule type and frequencies. Check the description in Summary, and click OK to save changes if schedule is configured properly. Click on the Next button in Maintenance Plan Wizard to proceed with the configuration.
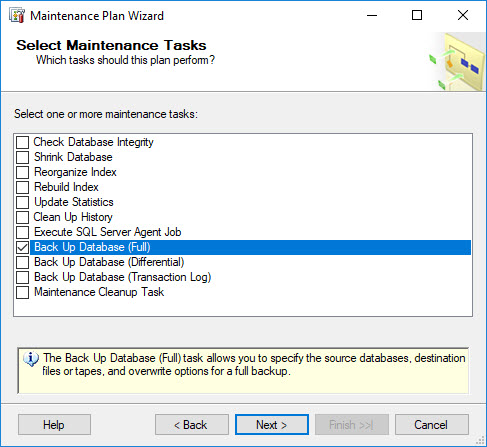
- In second step of the wizard, select Back Up Database (Full) option, and click on Next to proceed.
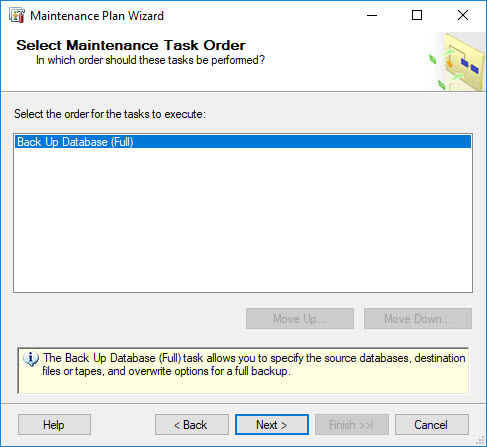
- Since only one task got selected in the previous step, there is no need to set the task execution order. Click Next to proceed.
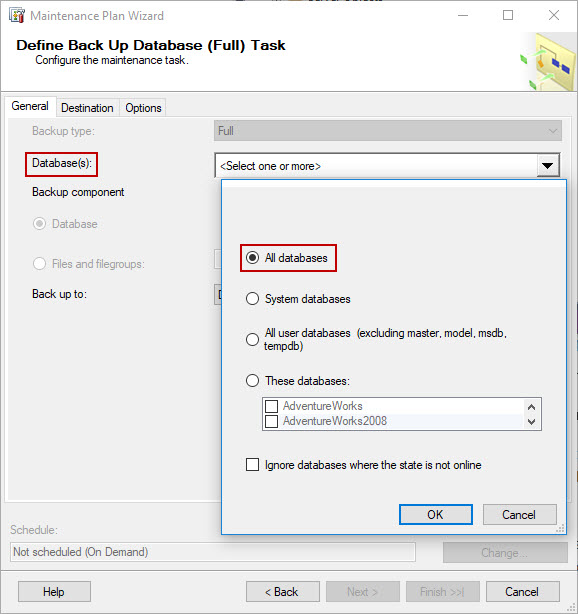
- In the General tab, open the drop-down menu for Database(s), and select option to back up All databases.
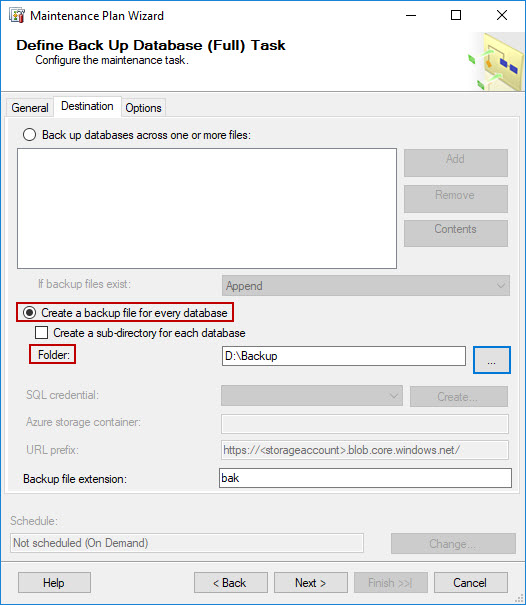
- In the Destination tab, select the option to Create a backup file for every database. Provide the backup destination path in Folder text box, and click on Next button.
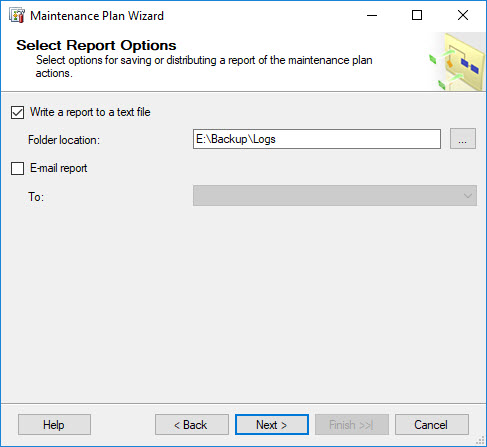
- Set the options for text and E-mail reports if needed, and click Next.
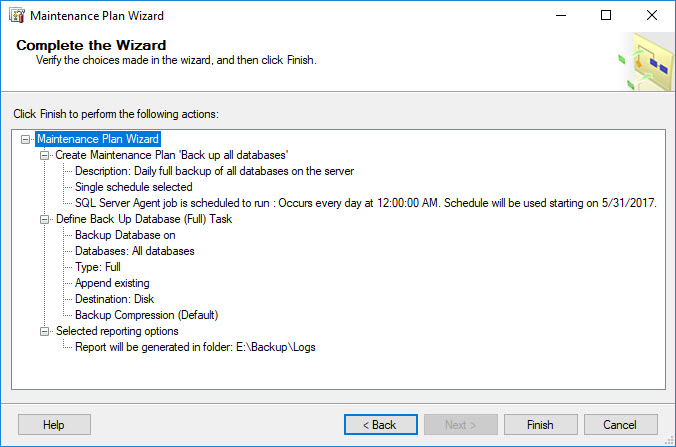
- In the final step, review all configured settings, and click Finish to save changes.
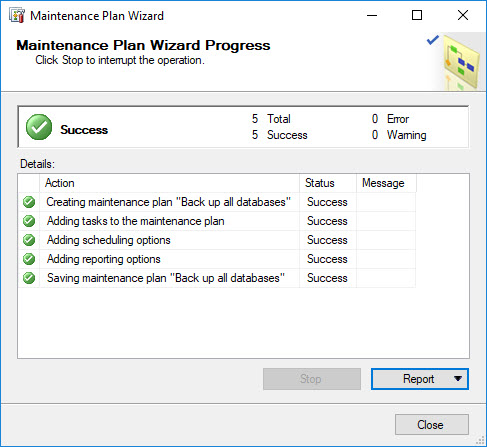
- The success message is generated as soon as wizard executes all given instructions.
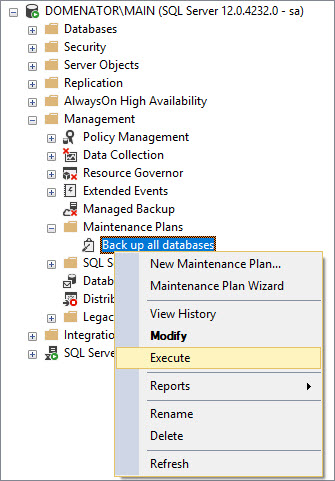
- To execute created maintenance plan, expand the Management and Maintenance Plans nodes in the Object Explorer. Right click on the created maintenance plan (Back up all databases in this case), and select Execute.
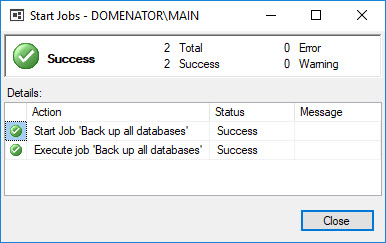
- A “Success” message is generated upon successfull execution.
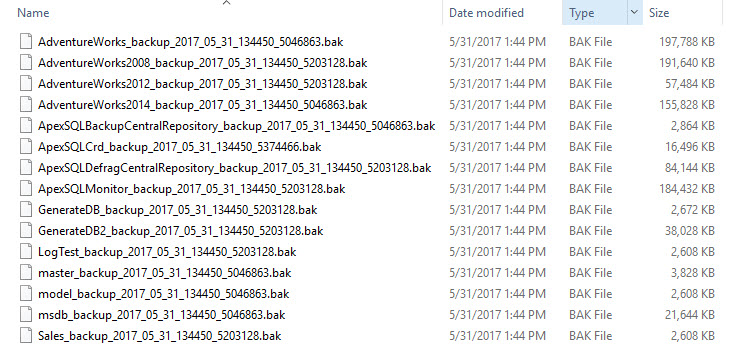
- To make sure that the maintenance plan worked, check the folder specified as the backup destination. When maintenance plans are used, the names for the backup files are generated automatically, and they contain strings for database name, year, month, date, hours, minutes and seconds. Unfortunately, there is no option to set custom naming rules for backup files when maintenance plans are used.
Back up multiple SQL databases with ApexSQL Backup
ApexSQL Backup is a 3rd party software solution used for managing backup, restore and various maintenance operations. Backup schedules for multiple SQL databases can be configured in a few simple steps:- To be able to manage any server with the application, it is necessary to add it in the server pane first. In the Home tab, click on Add button.

- In Add SQL Server dialogue, select the server to add, specify the authentication type, and provide username and password if SQL Server authentication type is selected. Click OK button to add selected server.

- As soon as the server is added, it becomes visible in the server list, along with all databases that are available on that server. Click on the Backup button in the Home tab to configure backup jobs.

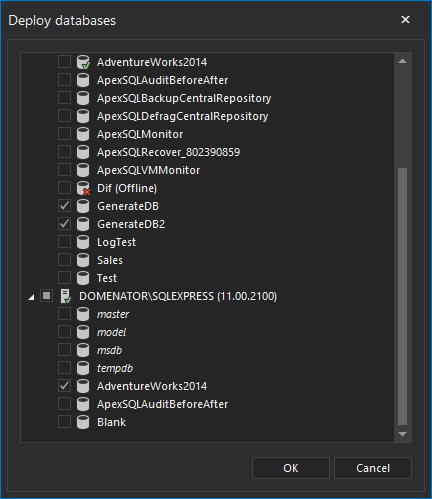
- All important settings are configured in the main tab of the backup wizard. Select the server from the SQL Server drop-down list. Click on the browse button in Databases box to specify which databases to back up. Check the box in the Name row to select all databases on the server. Uncheck the boxes in front of system databases if they need to be excluded from the job. Click OK to close the form.

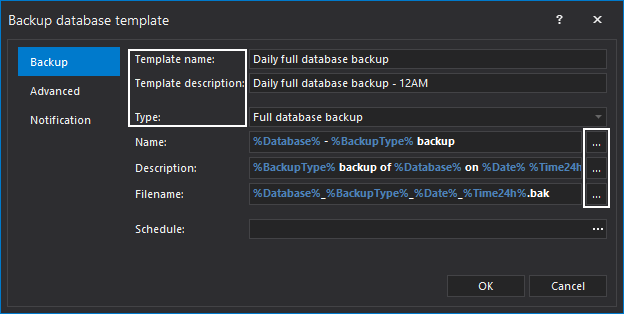
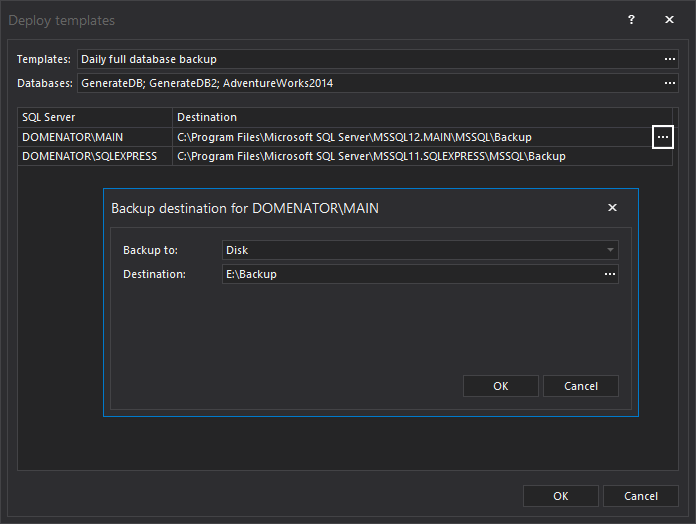
- Set the backup type to Full database backup. If needed, set the tags for the Job name and Job description. To set backup destination path, and configure custom naming rules, click on Add Destination button.

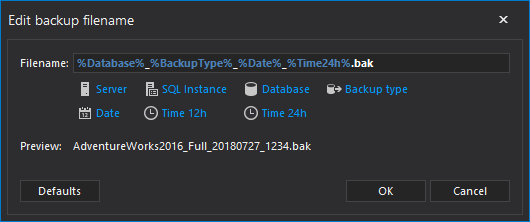
- In Add backup destination dialogue, type or browse for the backup destination path in the Folder text box. In the Filename box, configure the format of the backup filename by clicking on the corresponding tags. There are 7 different tags available, and each can be included in the backup filename. Check the name preview at the bottom of the page, and click OK if it is configured properly.

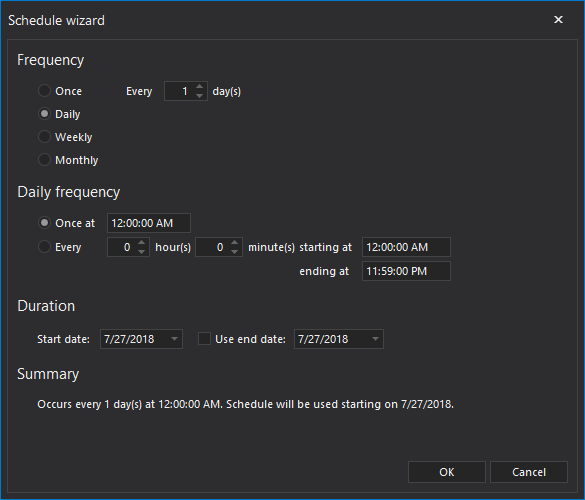
- Set the backup schedule by selecting Schedule radio button. In the Schedule wizard, set the frequency to match desired backup schedule. Check the summary at the bottom of the page to confirm that schedule is configured well. Click OK to save changes in the Schedule wizard. As in previous examples, the schedule is set to run at midnight, on a daily basis.

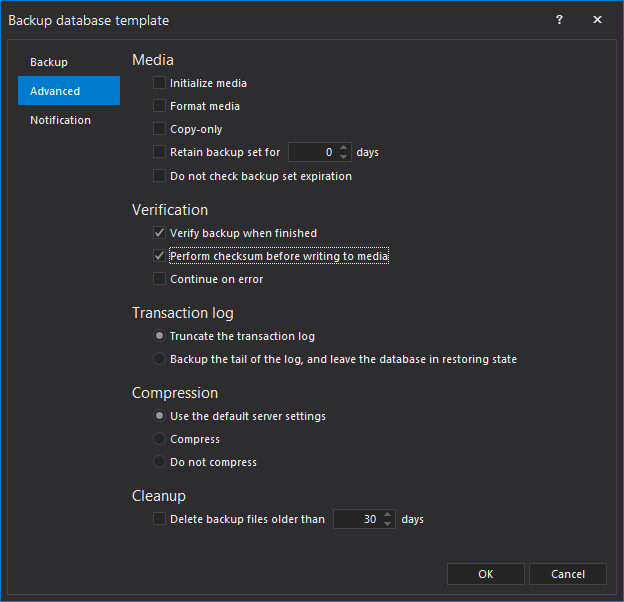
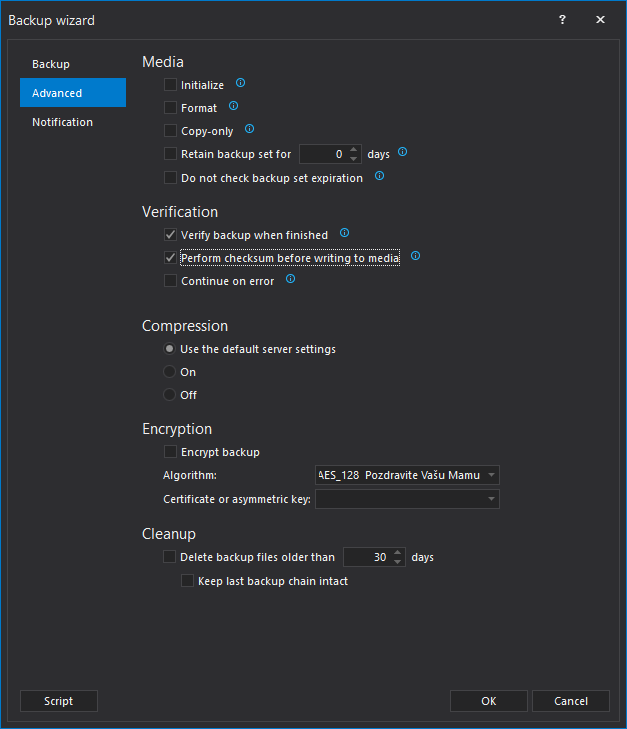
- Various options regarding media, verification, compression and encryption settings can be added to the job in the Advanced tab of the backup wizard.
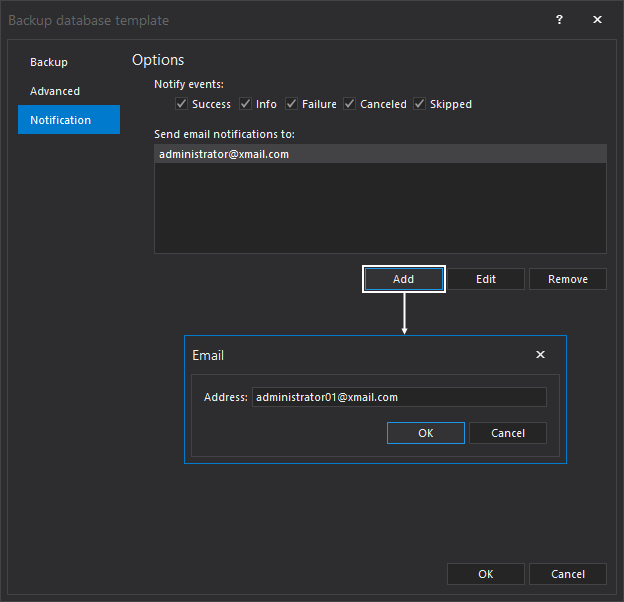
- Optionally, set the E-mail notifications in Notification tab.

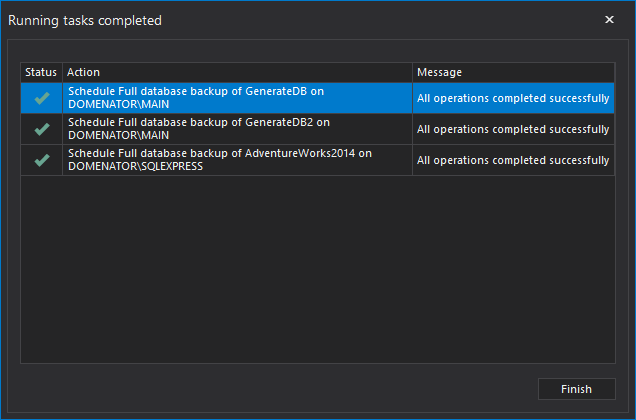
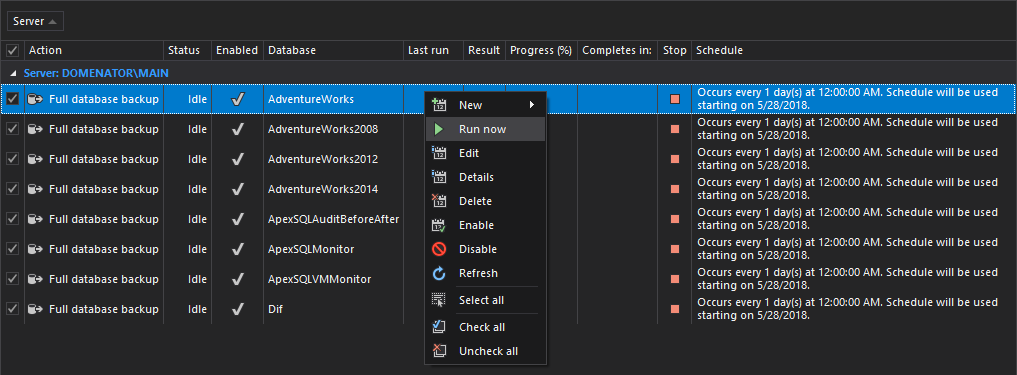
- After all steps in the Backup wizard are configured, click on the OK button at the bottom to create backup jobs for the selected databases selected in step 4. As seen on the completion message, a single job is created for each of the databases.

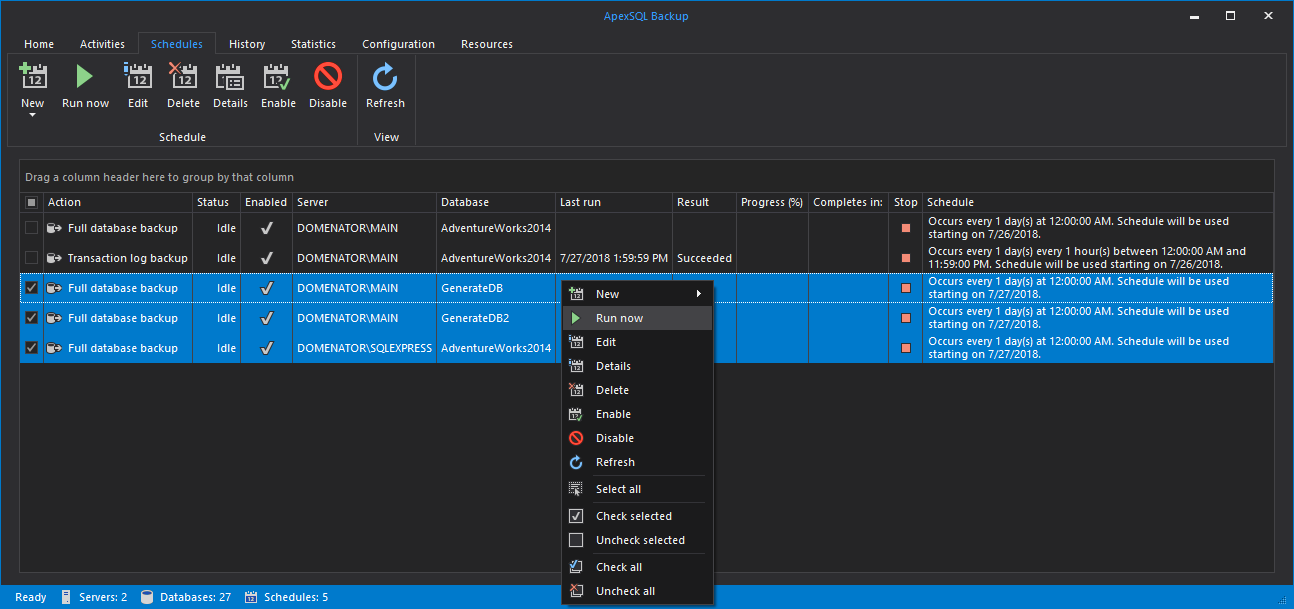
- To test created jobs, select Schedules view in main application form. Select all created schedules by clicking on the checkbox in the column heading row. Right click on any of the schedules to bring up the context menu, and select Run now. Jobs will be executed immediately, regardles of the schedule settings.
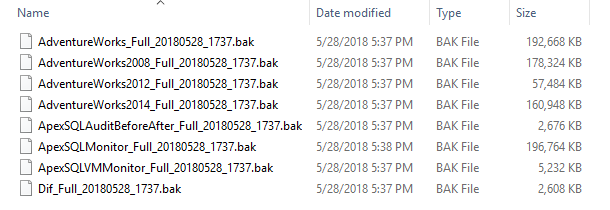
- Finally, check for the created backup files in the folder speciffied in the backup path. Backup files can be easily recognized by the custom filenames. Furthermore, the creation date and time are readable directly from the filename.