Friday, April 29, 2016

How to Move Oracle VM OCFS2 Repositories Between Server Pools

How to Move Oracle VM OCFS2 Repositories Between Server Pools

The ability to quickly move Oracle VM OCFS2 reporitories between server pools (source and target) is an essential Oracle VM lifecycle operation.  
Prerequisites:
  • You may have to wipe the Oracle VM Manager repository database to be able to successfully complete this operation. If you have never successfully wiped your Oracle VM Manager repository database, and re-discovered resources, BEFORE moving forward confirm that you can indeed successfully wipe the Oracle VM Manager repository database, and recover all the resources. 
  • Before starting the process, the OCFS2 reporitories that will be moved from the source to target server pool should not be mounted by "any" Oracle VM Servers. 
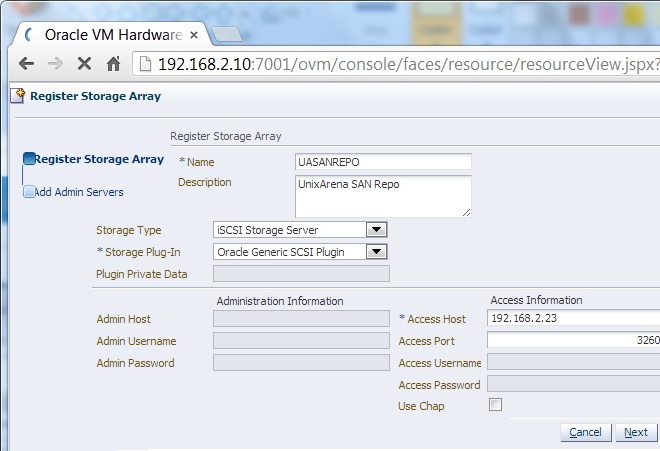
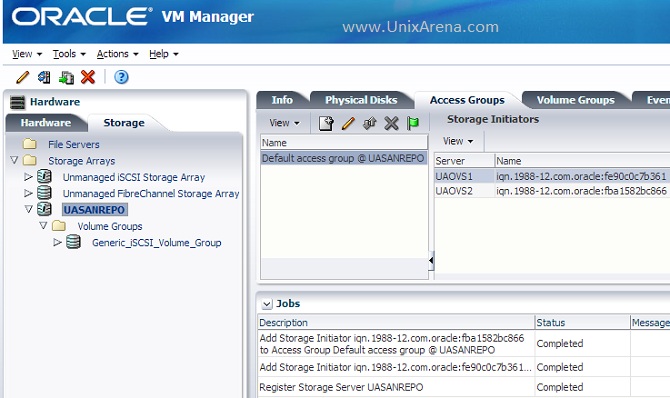
  • The OCFS2 repositories should only be zoned and masked to the target Oracle VM Servers. 

1) This step is optional/informational. This step is only done on one dom0 to confirm cluster IDs. Once we have the correct cluster ID, for a sanity check, we list the old repositories cluster ID.
a) from only one dom0, as root, confirm the target pools cluster ID:
# o2cluster -o /dev/mapper/<the poolfs>
Write down the cluster ID from the new pool.
b) from only one dom0, as root, confirm the previous pool's cluster ID (the repositories will have the previous pool's cluster ID):
# o2cluster -o /dev/mapper/<wwid of existing repo1>
# o2cluster -o /dev/mapper/<wwid of existing repo2>
# o2cluster -o /dev/mapper/<wwid of existing repo3>
2) from only one dom0, as root, fsck.ocfs2 each repository (select Y, that's it!):
# fsck.ocfs2 /dev/mapper/UUID
fsck.ocfs2 1.8.2
[RECOVER_CLUSTER_INFO] The running cluster is using the o2cb stack
with the cluster name ce53582811c386e9, but the filesystem is configured for
the o2cb stack with the cluster name 76e9713d2092bfe6. Thus, fsck.ocfs2 cannot
determine whether the filesystem is in use or not. This utility can
reconfigure the filesystem to use the currently running cluster configuration.
DANGER: YOU MUST BE ABSOLUTELY SURE THAT NO OTHER NODE IS USING THIS
FILESYSTEM BEFORE MODIFYING ITS CLUSTER CONFIGURATION.
Recover cluster configuration information the running cluster? <n> y
Checking OCFS2 filesystem in /dev/mapper/36000d31000394200000000000000004e:
  Label:              OVS40ce40cbe9d1e
  UUID:               0004FB000005000092940CE40CBE9D1E
  Number of blocks:   402653184
  Block size:         4096
  Number of clusters: 1572864
  Cluster size:       1048576
  Number of slots:    32

/dev/mapper/36000d31000394200000000000000004e wasn't cleanly unmounted by all nodes.  Attempting to replay the journals for nodes that didn't unmount cleanly
Checking each slot's journal.
Replaying slot 0's journal.
Slot 0's journal replayed successfully.
/dev/mapper/36000d31000394200000000000000004e is clean.  It will be checked after 20 additional mounts.
Slot 0's journal dirty flag removed

Before step 3, confirm if the cluster ID has been reset:
# o2cluster -o /dev/mapper/<wwid of existing repo1>
# o2cluster -o /dev/mapper/<wwid of existing repo2>
# o2cluster -o /dev/mapper/<wwid of existing repo3>

If the correct cluster ID has been set, skip step 3.

3) To set the new pool's cluster ID on the previous repositories, as root, from only one dom0, type the following command for each repo (this will set the correct cluster ID):
# tunefs.ocfs2 --update-cluster-stack /dev/mapper/<wwid from each LUN>
4) Next, on only one of the dom0s, mount each of the repositories and change/confirm that the Oracle VM Manager UUID is correct. You can list the target Oracle VM Manager UUID in the /dev/mapper/<the poolfs>/.poolfs file, i.e. # cat /dev/mapper/<the poolfs>/.poolfs
as well as the Oracle VM Manager GUI, Help => About.
OVS_REPO_MGR_UUID=CORRECT_UUID
Save the change.
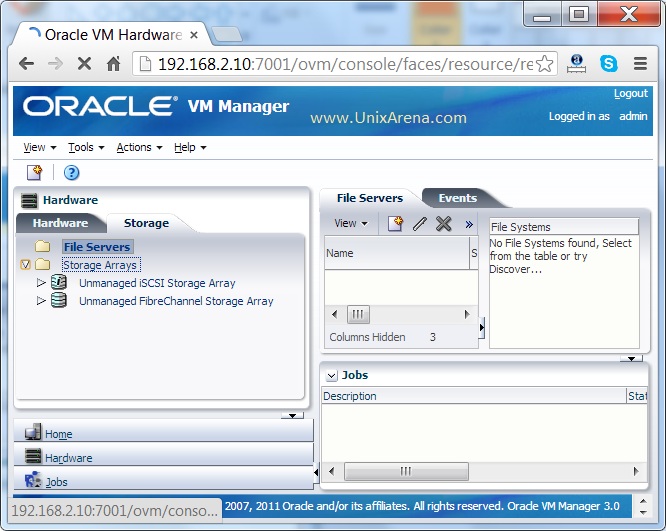
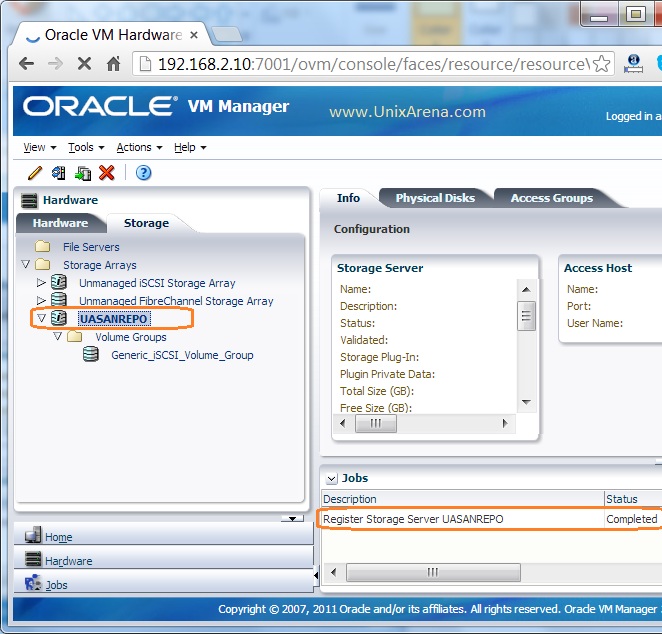
5) From the Oracle VM Manager, access the Storage Tab --> Shared File Systems --> Refresh (right click each repository, you can select any server, click "refresh")
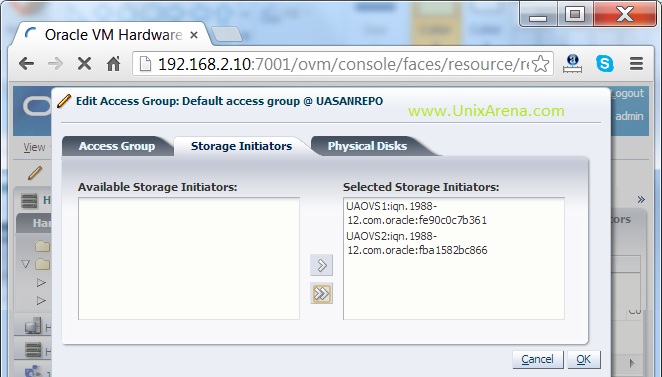
6) Next, access the Repositories Tab -> Present each the Pool, confirm that all of the hosts have been added. Next, refresh each repository.
If you receive a message saying there is a mismatch between the repo and pool ID, wipe Oracle VM Manager database repository and rediscover all the objects. The MySQL DB must be wiped to remove bad repository entries. The user friendly names will also need to be restored after the resources have been re-discovered. 
7) The VMs will now all be in the Unassigned Virtual Machines directory. Move to servers and start each VM

How to wipe the Oracle VM Manager MYSQL DB and rediscover all resources:
1) Oracle VM Manager host: Reset the Oracle VM Manager Database Repository. As root, access the Oracle VM Manager host, and drop the Oracle VM Manager Database Repository:
MySQL:
# /u01/app/oracle/ovm-manager-3/bin/ovm_upgrade.sh --deletedb --dbhost=localhost --dbtype=MySQL --dbport=49500 --dbsid=ovs --dbuser=ovs --dbpass=PASSWORD
Note: Substitute PASSWORD with the admin password.
SE or EE Database:
# /u01/app/oracle/ovm-manager-3/bin/ovm_upgrade.sh --dbhost=localhost --dbport=1521 --dbsid=MYSID --dbuser=ovs --dbpass=PASSWORD --deletedb
Note: Substitute localhost with the hostname, i.e. localhost or the host name of the DB server, MYSID with the Database SID, PASSWORD with the Database SYS password.
2) Oracle VM Manager Hosts: As root, access the Oracle VM Manager host, and stop and start the ovmm service:
# service ovmm stop && service ovmm start
3) Oracle VM Manager GUI: From the Oracle VM Manager Servers and VMs page, discover the Oracle VM Servers. 
Note: Up to Oracle VM Release 3.2.7 discover all the Oracle VM Servers. Oracle VM Release 3.2.8 only discover one Oracle VM Server.
4) Oracle VM Manager GUI: From the Oracle VM Manager Repositories page, refresh each storage repository, i.e. right click each repository, and click refresh.
5) Oracle VM Manager GUI: From the Servers and VMs page, rediscover each Oracle VM Server.
6) Oracle VM Manager GUI: From the Networking => Virtual NIC page, create new MAC addresses. Only the MAC addresses in use will be re-discovered. 

Wednesday, April 27, 2016

Copying Virtual Machines between repositories in Oracle VM for x86

Copying Virtual Machines between repositories in Oracle VM for x86

Back in the days of OVM 2.x, the repository filesystem structure was somewhat collapsed from what it looks like these days in 3.x.  It was much simpler to copy whole VM’s from one repository to another because the files were all in the same folder.  Today, the easiest way to move VM’s between repositories is to present both repo’s to the same pool (if they aren’t already), power off the VM and migrate it.  Voila!

Yeah- so what if I have two pools and I’m having problems getting both repo’s presented to the same pool?  Normally the way I’d handle this is by using an NFS repo as the go-between.  Create an NFS share and make a repository on top of it, then present it to both the source and target pools.  That’s one of the cool things about NFS repo’s is that you can have them presented to more than one server pool at a time unlike block based storage repo’s (Fiber Channel or iSCSI).  This is due to the nature of the OCFS2 filesystem and underlying clusterware mechanisms that don’t like repo’s from other clusters muscling in on their territory.  So the path there would be power off the VM, migrate it to the NFS repo in source pool.  Then go to the target pool and migrate the VM from the NFS repo into the target pool’s persistent repository whether that be Fiber Channel, iSCSI or even local disk on the OVM server.  Again- Voila!
Ok, but I don’t have NFS or don’t want to do it that way or just plain can’t do it that way form one reason or another.  So be stubborn then!  Below is the process that I followed recently with a customer to copy the VM files themselves from one repository to another.  In my case, the customer had 2 repositories sitting on Fiber Channel disk.  One repo used to belong to a server pool that had it’s pool filesystem sitting on an NFS share that inadvertantly got deleted out from under the pool.  Bad mojo there… Anyway I was having a heck of a time getting the repo presented to the new pool because OVM Mangler thought the repo was still part of the pool that now has no pool filesystem.  The pool filesystem’s job among other things is to help keep track of what is presented where and how.  Remember- the pool filesystem was whacked.  I’ll let that sink in for a bit.
Anyway- I was able to re-signature the OCFS2 filesystem and put the new cluster stamp on it so I could at least mount it on a server in my target pool where I wanted the VM’s to wind up.  I still couldn’t present the repository to the pool in OVM Manager due to the previously mentioned pool filesystem tom foolery that took place.  Regardless, it got me far enough to do what I need.  Keep in mind- I could have just copied the files across the network and not messed about with all this re-signaturing nonsense, but we’re talking about hundreds of gigs here and that would take too long for my impatienceness.
Here’s a high level outline of the steps I took to make this all work:
  • Make sure all VM’s to be moved are powered off
  • Take note of the following items for each VM (either from OVM Manager or the CLI) and put them into a notepad session
    • VM UUID (Servers and VM’s tab – Source Pool – Virtual Machines.  Click on the down arrow to expand the VM’s info)
    • VM Disk UUID’s (same place as above)
    • VM Disk names
    • Current Repository UUID (Repositories tab – Source Repository – info)
    • Page83 ID of the current repository LUN (see my post here on mapping physical disks in OVM to their page83 SCSI ID using OVM CLI)
  • create a folder in the target repository that matches the UUID of the VM you’ll be copying
mkdir /OVS/Repositories/{UUID of Target Repository}/VirtualMachines/{VM UUID}
  • make sure the source repository LUN is presented to all servers in the target pool from the SAN.  Also make sure you can see it in the output of fdisk -l or multipath -ll (if you’re using multipathing).
  • If necessary, resignature the repository LUN’s OCFS2 filesystem with the cluster ID of the target pool (do this from a server in the target pool)
fsck.ocfs2 /dev/mapper/{page83 ID of source repository LUN}

tunefs.ocfs2 --update-cluster-stack /dev/mapper/{page83 ID of source repository LUN}
  • mount the source repository on a server that belongs to the target pool and has that pool’s repository already mounted.  I use the /mnt mountpoint
  • copy the vm.cfg from the source repository to the destination repository
cp /mnt/VirtualMachines/{UUID of VM to copy}/vm.cfg /OVS/Repositories/{UUID of target Repository}/VirtualMachines/{UUID of VM to copy}
  • copy all the Virtual Disks for the VM from the source repository to the target repository.  Note the –sparse=always flag: this is used so that when you copy the files they don’t get inflated to their full size in the target repo.  I’m assuming you gave the VM thin provisioned disks (or sparse disks as OVM refers to them as) to begin with.
cp --sparse=always /mnt/VirtualDisks/{UUID of virtual disk(s) in VM}.img /OVS/Repositories/{UUID of target Repository}/VirtualDisks/
Here’s where things can go sideways.  Make sure you write down or copy into a notepad session the information I had you note before.  You’re going to create new UUID’s for the VM itself as well as all the virtual disks contained in that VM.  Pay attention and go slow!
  • Create a new UUID for the VM’s identity and for each virtual disk that belongs to the VM
# uuidgen -r
18286ea4-55d7-424f-9c9b-6d250e64daee
{repeat for each virtual disk and write each one down}
  • cd into the target repository
  • cd into the VirtualDisks folder
  • for each disk that belongs to the VM, rename the virtual disk from it’s original UUID to the new one you just created.  Note which UUID you used and map the old one to the new one in your notepad session for later.
  • make a backup of the vm.cfg file (put it in another folder not the current one)
  • open the vm.cfg file in the target repository (OVS/Repositories/{UUID}/VirtualMachines/{UUID of VM}/vm.cfg)
  • Locate the line that begins with “disk = [“.  This is the listing of all the virtual disks assigned to this VM.  You will need to modify each disk entry to reflect the following:
    • change the UUID of  the repository so it points to the target repo not the source (/OVS/Repositories/{UUID})
    • change the UUID of the disk file to reflect the new UUID you created a few steps earlier (/OVS/Repositories/{UUID}/VirtualDisks/{new UUID of virtual disk})
  • Locate the line that starts with “name = ”
    • Replace the current contents of this field with the UUID that you generated earlier for the VM’s identity.  Note that you’ll have to strip out all of the dashes for this field.
  • Locate the line that starts with “uuid = ”
    • Replace the current contents of this field with the UUID that you generated earlier for the VM’s identity.  In this field, you will leave the dashes intact as they are.
  • Write the file out to disk
  • cd to the target repository
  • cd to the VirtualMachines folder
  • rename the old UUID of the VM to the new one you created
mv {old UUID} {new UUID}
  • At this point, you should be able to go into the OVM Mangler interface and navigate to the repository tab
  • locate the target repository and refresh it
  • go to the Servers and VM’s tab
  • look in the Unassigned Virtual Machines folder and you should see the VM you copied
  • edit the VM and rename the virtual disk names to what they used to be in the source repo.  You will be renaming them from something like 18286ea455d7424f9c9b6d250e64daee.img to rootdisk_OS or whatever your disks were named before.  Use your notepad to fill in the details.
  • migrate the VM to the target pool
  • power on the VM
  • bask in your awesomeness for having done everything right the first time
OR
  • look at whatever error messages are thrown at you and observe your typo’s so you can fix them:).


Thursday, April 14, 2016

How is Network Bonding Used in Oracle VM?

How is Network Bonding Used in Oracle VM?

Network bonding refers to the combination of network interfaces on one host for redundancy and/or increased throughput. Redundancy is the key factor, it is desirable to protect the entire virtualized environment from loss of service due to failure of a single physical link. This network bonding is the same as the Linux network bonding or Oracle Solaris data link aggregation. Using network bonding in Oracle VM may require some switch configuration.
Important
While Oracle VM Manager uses the Linux terminology for network bonds, Oracle Solaris users should understand this to be equivalent to data link aggregation.
In Oracle VM, there are three modes of network bonding:
  • Active Backup or Active-Passive (mode 1): There is one NIC active while another NIC is asleep. If the active NIC goes down, another NIC becomes active. While this mode does not increase throughput, it provides redundancy in case of failure. Active Backup is a safe option if you intend to make use of VLANs.
  • Dynamic Link Aggregation or Link Aggregation (mode 4): Aggregated NICs act as one NIC which results in a higher throughput, but also provides failover in the case that a NIC fails. Dynamic Link Aggregation requires a switch that supports IEEE 802.3ad. Dynamic Link Aggregation is the preferred mode of network bonding, but requires that the network is configured correctly on the switch. Furthermore, you should be aware that there are significant cabling requirements. An initial guideline is that all of the Ethernet ports aggregated into a single bond using this bonding mode must be connected to the same switch.
  • Adaptive Load Balancing or Load-Balanced (mode 6): The network traffic is equally balanced over the NICs of the machine and failover is also supported to provide redundancy. Unlike Dynamic Link Aggregation, Adaptive Load Balancing does not require any particular switch configuration. Adaptive Load Balancing is only supported in x86 environments. Adaptive Load Balancing may not work correctly with VLAN traffic.
Note
Adaptive Load Balancing (mode 6) is currently not supported for SPARC servers.

Figure 5.2 Network bonding
This figure illustrates network bonding.

During installation of Oracle VM Server, the network interface (selected when prompted for the management port) is configured as a bonded interface. The bond is created with only one interface. This is done because the reconfiguration of the management interface on the Oracle VM Servers is not supported. You can add a second interface to the already existing bond device without affecting the configuration of the original interface. This is illustrated in Figure 5.2, “Network bonding”, where a second network interface is added to bond0, the network bond created during installation. By default, the bond mode is set to Active Backup for the management network.
Figure 5.2, “Network bonding” also illustrates the configuration of a second bonded interface, bond1, which can be used for other network usage, such as the virtual machine channel. Separation of network functions into different channels is discussed in more detail in Section 5.6, “How are Network Functions Separated in Oracle VM?”.
It is important to understand that the actual cabling of Ethernet interfaces is important when using network bonds. If you are using Active Backup (mode 1) or Adaptive Load Balancing (mode 6), the Ethernet ports can be connected to alternate switches as shown in Figure 5.3, “Network bonding for modes 1 and 6”. On the other hand, if you are using Dynamic Link Aggregation (mode 4), the Ethernet ports must be cabled to the same switch, which is configured for dynamic link aggregation (IEEE 802.3ad). This is illustrated in Figure 5.4, “Network bonding for mode 4”.

Figure 5.3 Network bonding for modes 1 and 6
This figure illustrates network cabling to switches for bonding modes 1 and 6. The Ethernet ports that make up the bond can be cabled to alternate switches.


Figure 5.4 Network bonding for mode 4
This figure illustrates network cabling to switches for bonding mode 4. The Ethernet ports that make up the bond must be cabled to the same switch, which is configured for dynamic link aggregation (IEEE 802.3ad).

For more information on configuring bonds in Oracle VM, see Bond Ports Perspective in the Oracle VM Manager User's Guide.

Wednesday, April 13, 2016

How to add ISCSI storage array to OVM ?

How to add ISCSI storage array to OVM ?

Oracle VM storage mechanisms uses oracle storage connect plug-ins. Oracle provides two type of generic plugins along with oracle VM software. One is Storage array plugin that  used to connect  block level storage and the second one is  a filesystem plugin that is used to connect network filesystem based storage.These plugins will just help you to detect the storage LUNS . You can’t resize the LUNS from oracle VM manager unless you have storage plugins from respective storage vendors. For an example , if you want to connect to EMC storage , you need to get the storage plugins from EMC for oracle VM server. So that you can create a LUN, modify the LUN size and configure the access group.
Here we will see how to add the ISCSI storage array to oracle VM and how to provide the access to oracle VM servers for storage.
1.Login to oracle VM console.Here i have UAOVS1 and UAOVS2 oracle VM server have been configured on server pool.

Login to OVM console

2.Click on the hardware tab and select the storage tab.

OVM Storage tab
OVM Storage tab

3.In the above screen , you can see two default generic storage array plugins. One is for ISCSI storage and another one is for FC SAN.Right Click on the “Storage array” and register the new storage. It will open below wizard.
  • Storage Array Name – UASANREPO
  • Storage Type – ISCSI storage server.
  • ISCSI server IP – 192.168.2.23.
  • Default ISCSI port :3260

Registering new ISCSI array

4.Add the OVS server to administrate this storage.

Select the admin servers

5.Once you have finished the above wizard, you can see new ISCSI storage array has been added to the oracle  VM manager.

ISCSI Storage Array Added

6.Click on the “UASANREPO” and select the access group tab to provide the access to Oracle VM servers’s  iqn number.Click on the Default access group and select edit.

Edit the access group

7.Add the oracle VM server’s storage initiators to the access group. You can see that one initiator from UAOVS1 oracle VM server and another one from UAOVS2 oracle VM server.I have given access to both the box.

Add the servers  storage initiators for storage access
Add the servers storage initiators for storage access

8.Once the initiators are added, You can see the storage initiators like the below snap.

Storage initiator has been added to OVS server

9.You can click on the physical disks tab to see the LUNS which are provisioned from ISCSI server.

ISCSI storage LUNS
ISCSI storage LUNS

We have successfully added the ISCSI storage server to oracle VM server. These storage LUNS will be used for various purpose on the oracle VM server. You can use these LUNS for virtual machine storage, creating the repositories, cluster configuration storage,creating the virtual disks and assigning the raw LUNs to virtual machine.
Hope this article is informative to you .
Share it ! Comment it !! Be Sociable !!!

Monday, April 11, 2016

Disable/Enable Automatic Startup Oracle HAS

Disable/Enable Automatic Startup Oracle HAS

On 11gR2, Oracle Clusterware consists of two separate stacks: an upper stack anchored by the Cluster Ready Services (CRS) daemon (crsd) and a lower stack anchored by the Oracle High Availability Services daemon (ohasd).

So.. How to disable/enable Oracle HAS.
Use the crsctl disable has command to disable automatic startup of the Oracle High Availability Services stack when the server boots up.
# crsctl config has
CRS-4622: Oracle High Availability Services autostart is enabled.
How to know Oracle HAS is enabled(if doesn't use "crsctl config has")
# cat /etc/oracle/scls_scr/rhel5-test/root/ohasdstr
enable

# crsctl disable has
CRS-4621: Oracle High Availability Services autostart is disabled.

# crsctl config has
CRS-4621: Oracle High Availability Services autostart is disabled.

# cat /etc/oracle/scls_scr/rhel5-test/root/ohasdstr
disable
Use the crsctl enable has command to enable automatic startup of the Oracle High Availability Services stack when the server boots up.
# crsctl enable has
CRS-4622: Oracle High Availability Services autostart is enabled.

# cat /etc/oracle/scls_scr/rhel5-test/root/ohasdstr
enable
If We just check HAS Disable/Enable status, that uses "crsctl config has" command, it's easier than "ohasdstr" file checking.

How about "crsctl disable/enable crs" on 11gR2?
They disable/enable automatic startup of Oracle HAS.

I posted "check enable/disable the startup of CRS".. that show Oracle Clusterware version <= 11gR1, we can check from "crsstart" file. On 11gR2, crsstart file is not used ??? 

Use the crsctl disable crs command to prevent the automatic startup of Oracle High Availability Services when the server boots.


Use the crsctl enable crs command to enable automatic startup of Oracle High Availability Services when the server boots.
# crsctl config has
CRS-4622: Oracle High Availability Services autostart is enabled.

# crsctl config crs
CRS-4622: Oracle High Availability Services autostart is enabled.

# ls -ltr /etc/oracle/scls_scr/rhel5-test/root/
-rw-r--r-- 1 root root 7 Sep 7 00:56 crsstart
-rw-r--r-- 1 root oinstall 5 Nov 22 17:04 ohasdrun
-rw-r--r-- 1 root oinstall 7 Nov 22 17:10 ohasdstr
# cat /etc/oracle/scls_scr/rhel5-test/root/crsstart
enable

# cat /etc/oracle/scls_scr/rhel5-test/root/ohasdstr
enable

# crsctl disable crs
CRS-4621: Oracle High Availability Services autostart is disabled.

# crsctl config crs
CRS-4621: Oracle High Availability Services autostart is disabled.

# crsctl config has
CRS-4621: Oracle High Availability Services autostart is disabled.

# ls -ltr /etc/oracle/scls_scr/rhel5-test/root/
-rw-r--r-- 1 root root 7 Sep 7 00:56 crsstart
-rw-r--r-- 1 root oinstall 5 Nov 22 17:04 ohasdrun
-rw-r--r-- 1 root oinstall 8 Nov 22 17:12 ohasdstr

# cat /etc/oracle/scls_scr/rhel5-test/root/crsstart
enable

# cat /etc/oracle/scls_scr/rhel5-test/root/ohasdstr
disable
However, check CRSCTL Utility Reference

4 COMMENTS:

Coskan Gundogar said...
Hi Surachart,

Is there a typo or am I missing something. I am expecting

cat /etc/oracle/scls_scr/rhel5-test/root/crsstart
disable

for the last execution because you disable it but your post says it is

cat /etc/oracle/scls_scr/rhel5-test/root/crsstart
enable

Am I missing something ?
Surachart said...
Thank You for your commend.

I'll check again...

But In my Test System, It's "enable" status in /etc/oracle/scls_scr/rhel5-test/root/crsstart file.
Surachart said...
Hi Again...

After test installation Grid Infrastructure for a Standalone Server (solaris)

$ crsctl check has
CRS-4638: Oracle High Availability Services is online

$ crsctl config has
CRS-4622: Oracle High Availability Services autostart is enabled.

$ cat /var/opt/oracle/scls_scr/sundb/root/crsstart
enable

$ cat /var/opt/oracle/scls_scr/sundb/oracle/ohasdstr
enable

$ crsctl disable has
CRS-4621: Oracle High Availability Services autostart is disabled.

$ cat /var/opt/oracle/scls_scr/sundb/root/crsstart
enable

$ cat /var/opt/oracle/scls_scr/sundb/oracle/ohasdstr
disable

$ crsctl enable has
CRS-4622: Oracle High Availability Services autostart is enabled.

$ cat /var/opt/oracle/scls_scr/sundb/root/crsstart
enable

$ cat /var/opt/oracle/scls_scr/sundb/oracle/ohasdstr
enable

That show... crsstart file not use anymore...

and if uses Grid Infrastructure for a Standalone Server "crsctl ... crs" can not use ...

$ crsctl disable crs
CRS-4013: This command is not supported in a single-node configuration.
CRS-4000: Command Disable failed, or completed with errors.

Wednesday, April 6, 2016

How to Set SSH Login Email Alerts in Linux Server

How to Set SSH Login Email Alerts in Linux Server

To carry out this tutorial, you must have root level access on the server and a little knowledge of nanoor vi editor and also mailx (Mail Client) installed on the server to send the emails. depending upon your distribution you can install mailx client using one of the following commands.
On Debian/Ubuntu/Linux Mint
# apt-get install mailx
On RHEL/CentOS/Fedora
# yum install mailx

Set SSH Root Login Email Alerts

Now login as root user and go to root’s home directory by typing cd /root command.
# cd /root
Next, add an entry to the .bashrc file. This file sets local environment variables to the users and does some login tasks. For example, here we setting a an email login alert.
Open .bashrc file with vi or nano editor. Please remember .bashrc is a hidden file, you won’t see it by doing ls -l command. You’ve to use -a flag to see hidden files in Linux.
# vi .bashrc
Add the following whole line at the bottom of the file. Make sure to replace “ServerName” with ahostname of your Server and change “your@yourdomain.com” with a your email address.
echo 'ALERT - Root Shell Access (ServerName) on:' `date` `who` | mail -s "Alert: Root Access from `who | cut -d'(' -f2 | cut -d')' -f1`" your@yourdomain.com
Save and close the file and logout and log back in. Once you login via SSH, a .bashrc file by default executed and sends you an email address of the root login alert.
Sample Email Alert
ALERT - Root Shell Access (Database Replica) on: Thu Nov 28 16:59:40 IST 2013 tecmint pts/0 2013-11-28 16:59 (172.16.25.125)

Set SSH Normal User Login Email Alerts

Login as normal user (tecmint) and go to user’s home directory by typing cd /home/tecmint/command.
# cd /home/tecmint
Next, open .bashrc file and add the following line at end of the file. Make sure to replace values as shown above.
echo 'ALERT - Root Shell Access (ServerName) on:' `date` `who` | mail -s "Alert: Root Access from `who | cut -d'(' -f2 | cut -d')' -f1`" your@yourdomain.com
Save and close the file and logout and login again. Once you login back again, a .bashrc file executed and sends you an email address of the user login alert.
This way you can set an email alert on any user to receive login alerts. Just open the user’s .bashrcfile which should located under the user’s home directory (i.e. /home/username/.bashrc) and set the login alerts as described above.

  How to Change Instance Type & Security Group of EC2 in AWS By David Taylor Updated April 29, 2023 EC2 stands for Elastic Compute Cloud...