Multi server PowerShell script to backup SQL Server databases automatically
Eighty-two percent of the enterprises expect the number of databases to increase over the next twelve months. An increase in data volumes can have negative effects on the performance of databases. Think about the storage requirement and backup strategy to meet the Recovery Time Objective and the Recovery Point Objective. RPO and RTO are two of the most important parameters of a disaster recovery or data protection plan.
Database backup overview
Let us take a look at some of the most common ways to back up the SQL Server database, and some of the best and most feasible solutions for data protection and disaster recovery scenarios.Let us focus on handling huge volumes of data using various techniques and/or methodologies. Some of us may have questions on how to decide the best-suited backup strategies for our environments; on automating and managing SQL Server database backup; on whether we should automate the database backup process using T-SQL, SSIS, or PowerShell or some other tool or technique; what the data recovery and protection plans available are; whether the SQL engine provides the required capabilities to schedule a job and run it across multiple servers; whether customization options are available; whether we have a robust method to perform backup activity.
Let find out the answers to those questions. I’m sure you’ll not be disappointed!
Getting started
A database administrator must make sure that all databases are backed up across environments. Understanding the importance of database backup is critical. Setting the right recovery objective is vital, and hence, we need to consider the backup options carefully. Configuring the retention period is another area to ensure integrity of the data.Backing up data regularly is always a good strategy on the one hand, and on the other, we must regularly test the backup copies to ensure that they’re tested and validated for smooth working of the systems, and to prevent any sort of corruption or, under extreme conditions, a disaster. The well-tested SQL Server database backup script that we’re going to discuss provides an essential safeguard for protecting the (critical) data stored in the SQL Server databases. Backups are also very important to preserve modifications to the data on regular basis.
With a well-configured SQL Server database backup, one can recover data from many failures such as:
- Hardware failures
- User-generated accidents
- Catastrophic disasters
There are different ways to back-up a database:
- SSMS – Backups can be performed manually using SQL Server Management Studio
- SQL Agent Job – Using a T-SQL script for backup
- Using Maintenance Plan – SSIS Packages
- SMO (SQL Server Management Objects) – PowerShell Scripts
- Using ApexSQL Backup
Let’s look at how other DBAs in the industry are tackling massive data growth, what their most important goals are, and strategy to backup SQL Server databases automatically. Let us also look at some of the third party tools for backup management.
The first three options are very well discussed in the How to backup multiple SQL Server databases automatically article. Now that the first three points are already covered, let’s look at the use of the PowerShell SMO options with ApexSQL Backup. We’ll learn about how we can increase the database performance and eliminate downtime to give users the best experience possible using ApexSQL Backup. Today’s challenge is to give customers the most visually appealing and contextually rich insights possible in a user-friendly interface. ApexSQL has all the rich features and has the intelligence to manage and deploy a SQL backup plan to many SQL instances. A good way to start this process is to test the feasibility by downloading the free trial version of the tool.
Initial preparation
The goal of many organizations is to manage the backup of SQL Server databases automatically. We’ll go through the necessary steps to create the PowerShell SQL Server database backup script shortly. We can list any number of SQL servers and databases using the script. We can also create multiple jobs to initiate backup on multiple servers.Pre-requisites
- Enable XP_CMDSHELL
- Before you proceed, set the execution policy on PowerShell
- Load the necessary modules if they’re not loaded automatically
- Add full rights on file share or local or remote location where you’d like the backups stored
- Add default permissions to BACKUP DATABASE and BACKUP LOG to members of the sysadmin fixed server role and the db_owner and db_backupoperator fixed database roles
EXEC sp_configure 'show advanced options', 1;
GO
-- To update the currently configured value for advanced options.
RECONFIGURE;
GO
-- To enable the feature.
EXEC sp_configure 'xp_cmdshell', 1;
GO
-- To update the currently configured value for this feature.
RECONFIGURE;
GO
- Handling multiple SQL Server databases automatically
- Managing local or remote database backups
- Email notification upon completion of every successful backup
- Setting the retention period
- Scheduling automated jobs
Constructing the PowerShell script
Let us walk through the script, step-by-step, along with looking at the details of the setup and configuration of the script. The complete script can be found in Appendix (A)Step 1: Declare the variable, and load the SMO library

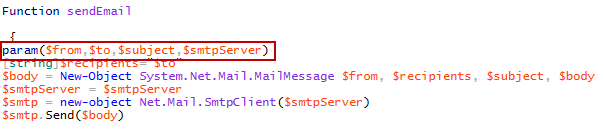
Step 2: Define the email functionality
Step 3: Looping through databases
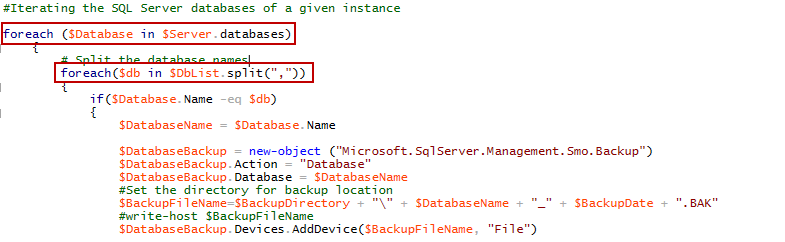
Step 4: Initiate Database backup and Email body preparation

Step 5: Manage database backup file

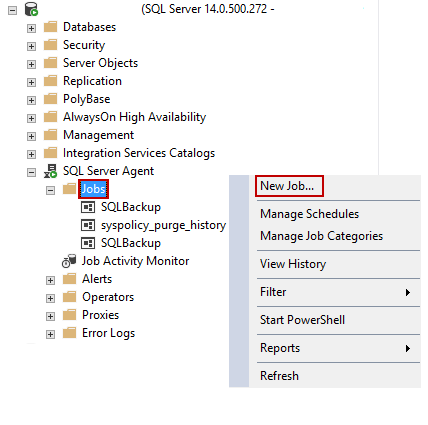
Let’s now go about using this script to back up the database by scheduling an SQL Job. Using Object Explorer, expand the SQL Server Agent. Right-click on Jobs. Select New job.
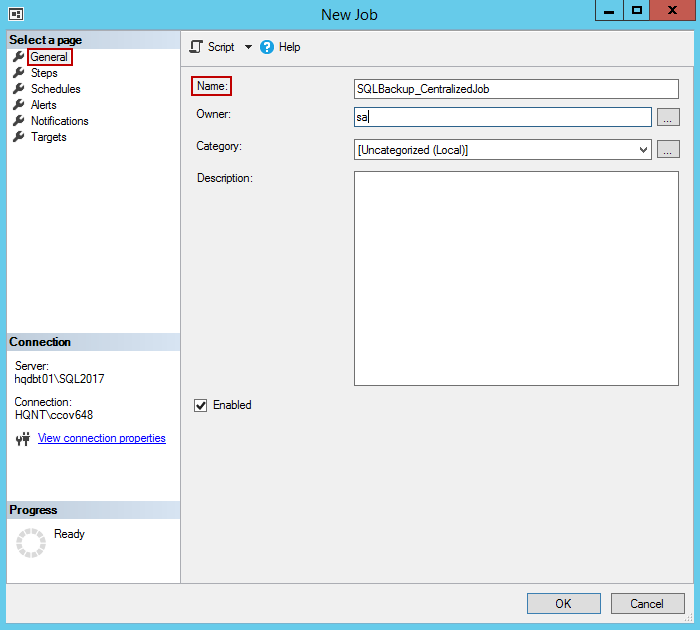
In the General tab of the window that pops up, enter the name, owner and the description for the job. Let’s call this SQLBackupCentralizedJob.
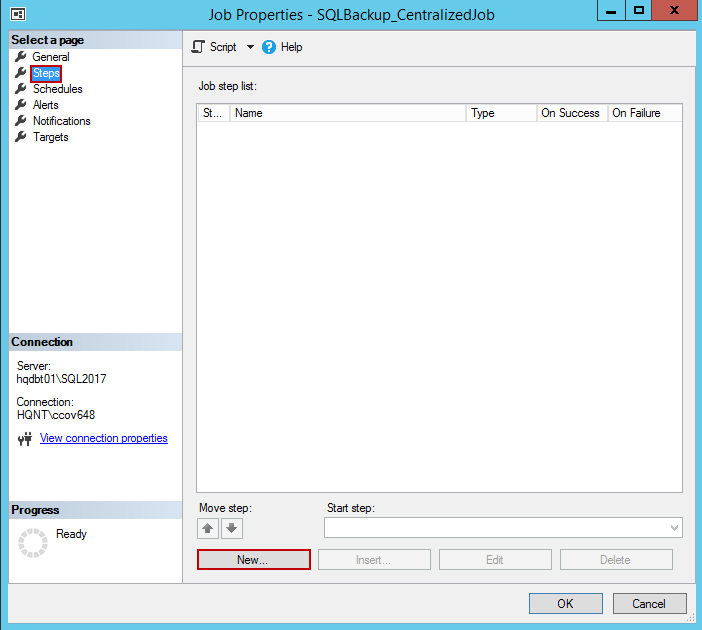
In the Steps tab, click on New to configure the job.
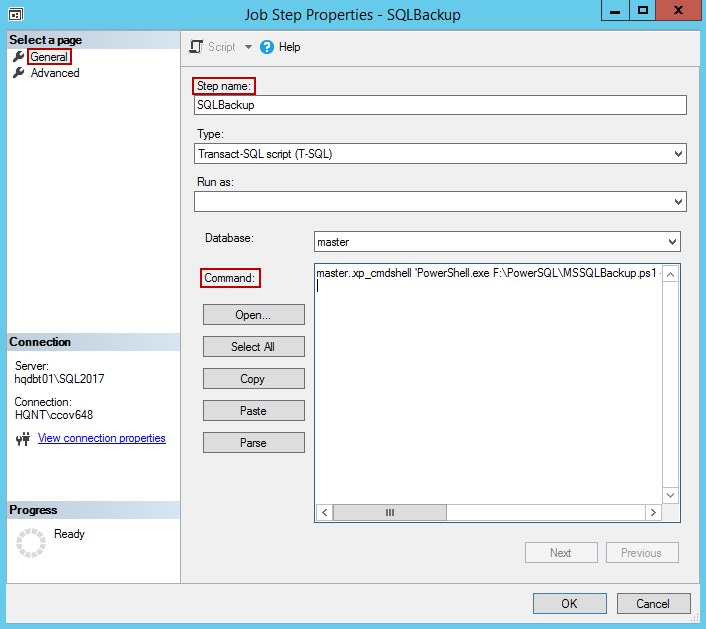
In the General tab,
- Mention the step name as SQLBackup,
- Set the job type to Transact-SQL script (T-SQL)
- Select the master database in the Database box.
- Paste the following script that will be used for this job in the Command box. Click OK.
master..xp_cmdshell 'PowerShell.exe F:\PowerSQL\MSSQLBackup.ps1'
- Click OK.
We have now successfully created the job.
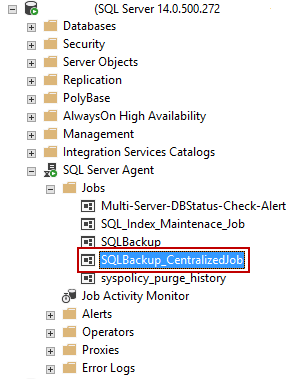
Right-click on SQLBackup_CentralizedJob and run it.
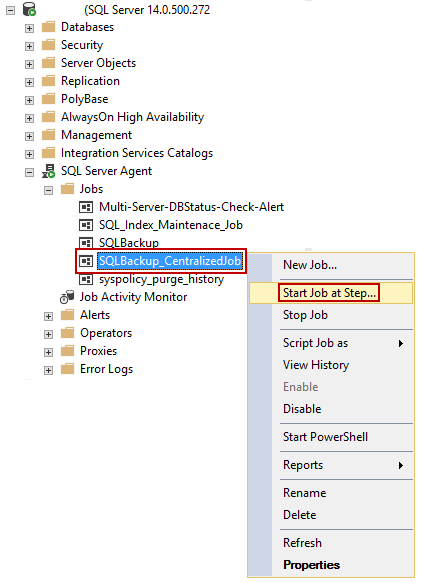
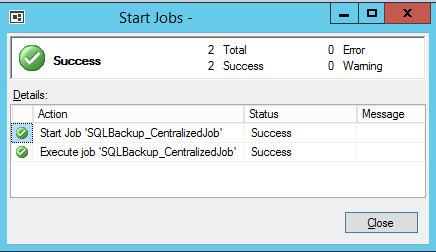
We can check the backup folder for the backup files; it would tell us the progress, like so:
Invoke_SQLDBBackup -SQLServer HQDBT01 -BackupDirectory f:\SQLBackup -dbList "SQLShack_Demo,ApexSQLBAckup" -rentention 3 -Mail Yes
Invoke_SQLDBBackup -SQLServer HQDBSP18 -BackupDirectory f:\PowerSQL -dbList "SafetyDB,rtc,rtcab1" -rentention 3 -Mail Yes

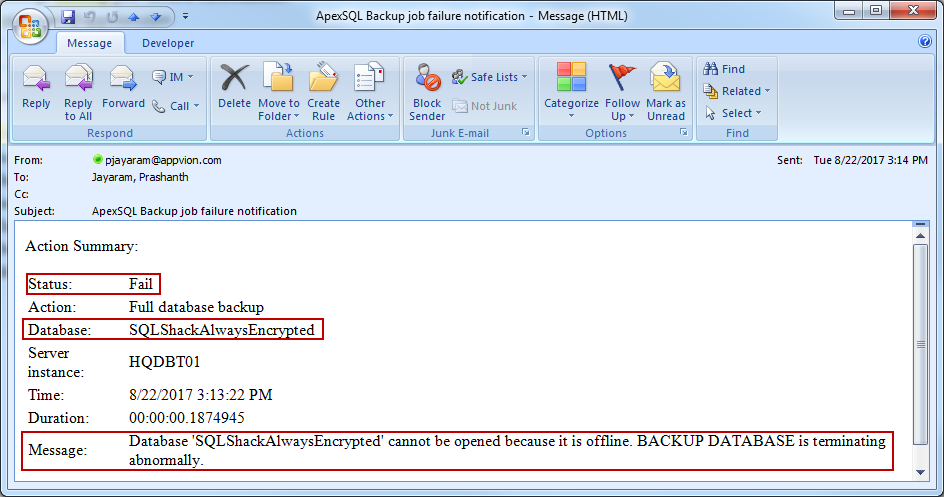
Verify the email

Back up multiple SQL databases with ApexSQL Backup
ApexSQL Backup is a third-party software solution that can be used to define and/or manage the backup/restore processes and perform various maintenance operations. The tool is capable of performing the backup of SQL Server databases automatically.The backup of multiple SQL databases can be configured in a few simple steps:
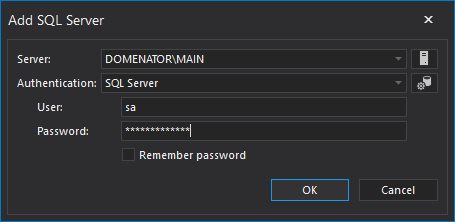
Step 1: Register the server
- Select Home tab
- Click Add button
- Enter the SQL Server
- Select authentication type
- Click Ok

Step 2: The Backup Configuration Wizard
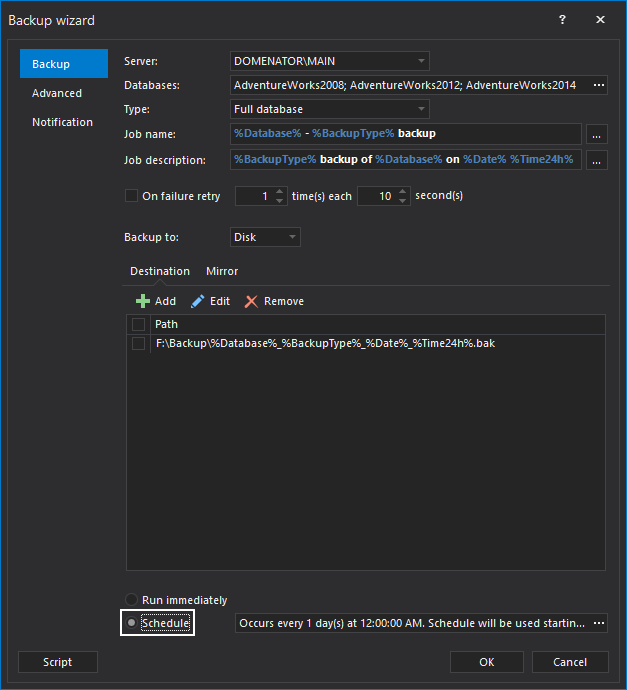
Now you should see all the databases that are available on that server. Click on the Backup button on the Home ribbon tab to configure the jobs.

The main tab of the backup wizard is for backup settings and defining the backup configuration. This section has three options
- Backup
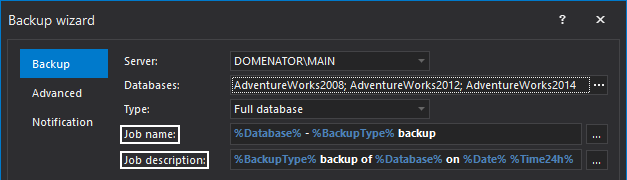
- Select the SQL Server from the drop-down list; you can select the server you’d like to configure the backup for
- In the Databases, browse and check the intended databases for backup
- Click OK

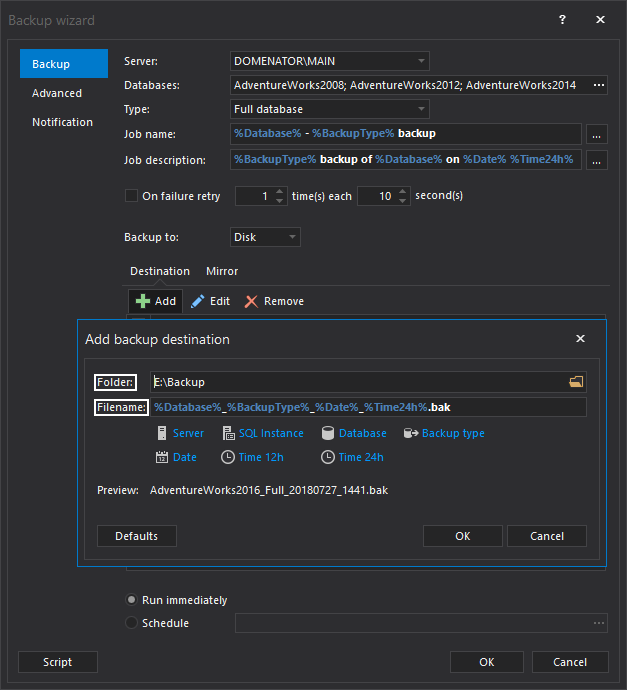
Next, set the backup type, defining the backup location and its standards - Select the type of the database backup
- To have a better experience, set the Job name and the Job description. It’s usually a good practice to do so.
- Click on the Add button in Destination group, and set the backup destination path, or configure custom naming rules.
- Browse for the destination path in the Folder text box.
- In the Filename box, configure the format of the backup filename by clicking on the corresponding tags—you can select from the seven available tags. Each of those can be included in the backup filename. Check the summary and click OK if everything is configured as required. You can click on ApexSQL defaults to reset the configuration.
- Click OK
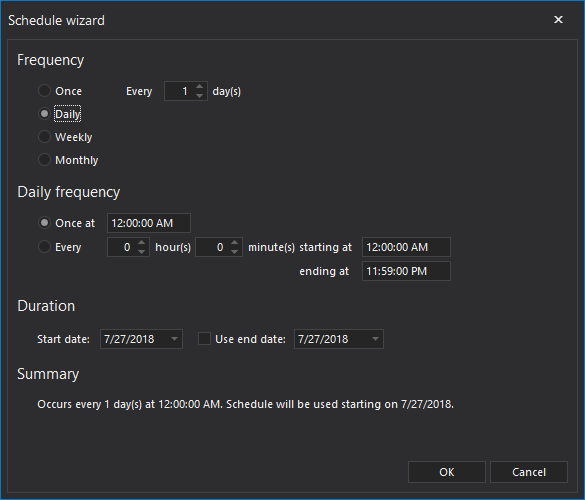
Now, let us schedule the backup job using the Schedule wizard. This wizard is invoked using the overflow (…) button. - In the wizard, set the frequency, daily frequency and activity schedule of database backup as desired. Check the summary at the bottom of the page to confirm that the configuration is done as required. Click OK to save changes in the Schedule Wizard.
- Click OK.
- The Advanced tab
We can add various media, verification, compression and encryption options along with encryption settings in the Advanced tab of the wizard.
- Set the retention period in the cleanup tab to clean-up the database backup files
- Click OK.

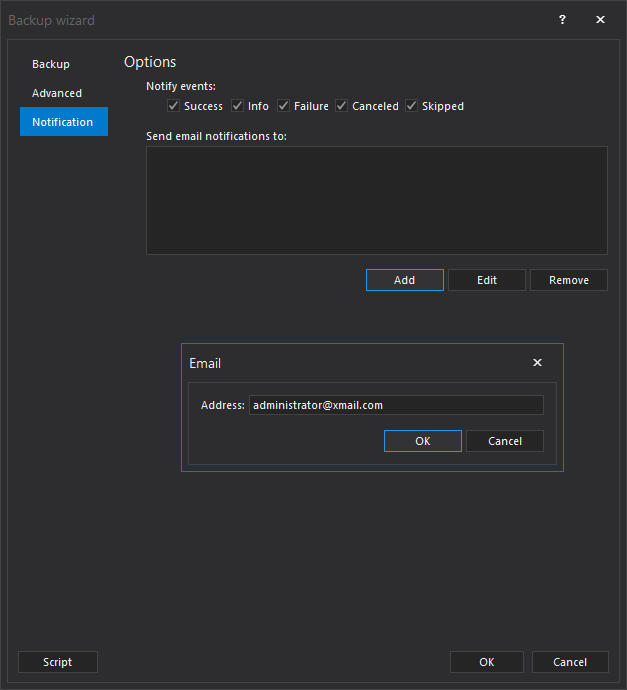
- Notification
Use the notification tab to set the type of alerts you would like an email notification sent for.
- Use Options tab to select the notification events
- Click the Add button to add recipient details
- Click OK to commit.
- How to backup multiple SQL Server databases automatically
- Using the Set-ExecutionPolicy Cmdlet
- Using PowerShell and SMO to list Databases (and other stuff)
- Send-MailMessage
After the configuration is complete, click OK to confirm the same. This would create backup jobs for the databases. We performed one configuration, but it created jobs for each of the databases we selected. It couldn’t get any easier! Of course, you can make individual modifications to create exceptions.

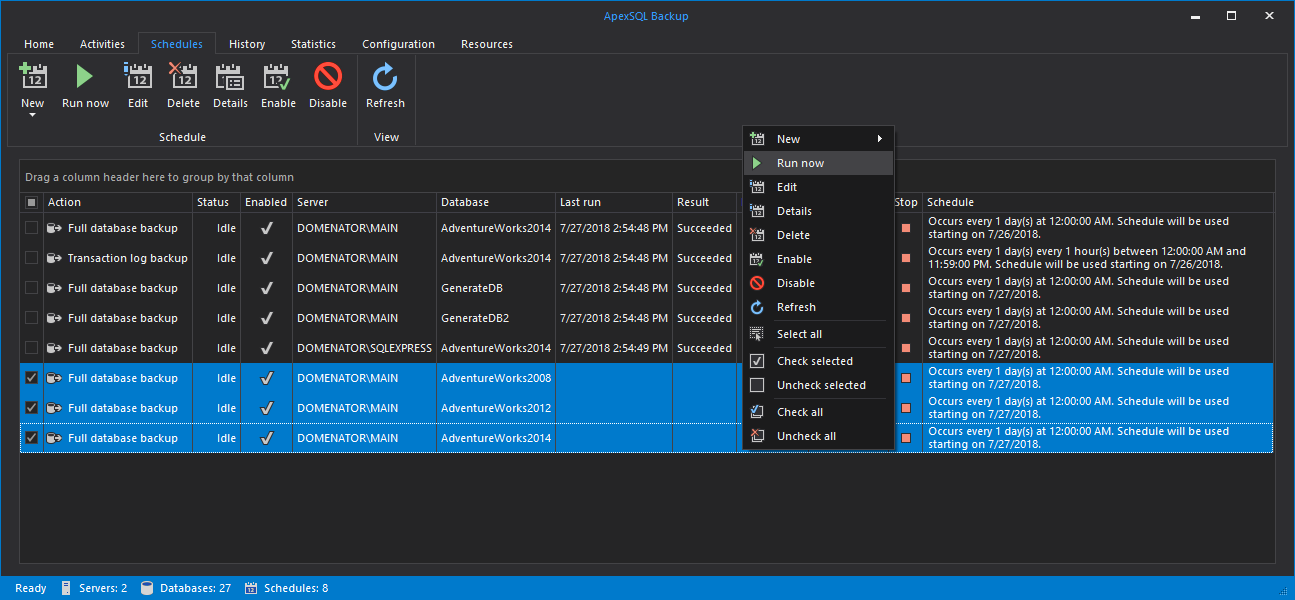
Select the Schedules tab in main application form to check the jobs we created. Just like selecting the databases, you can check the box on the header to select all the schedules we created. Right-click on any of the schedules to bring up the context menu. Select Run now. The corresponding jobs will be executed immediately, irrespective of the schedule settings—this is like a force-run.
The result column shows the final status of the database backup jobs—the status of each of the jobs that have the schedule information in the central repository. If you’d like to perform an action on any one job, you can select the relevant checkbox and click on the action, such as Run now, or Disable.
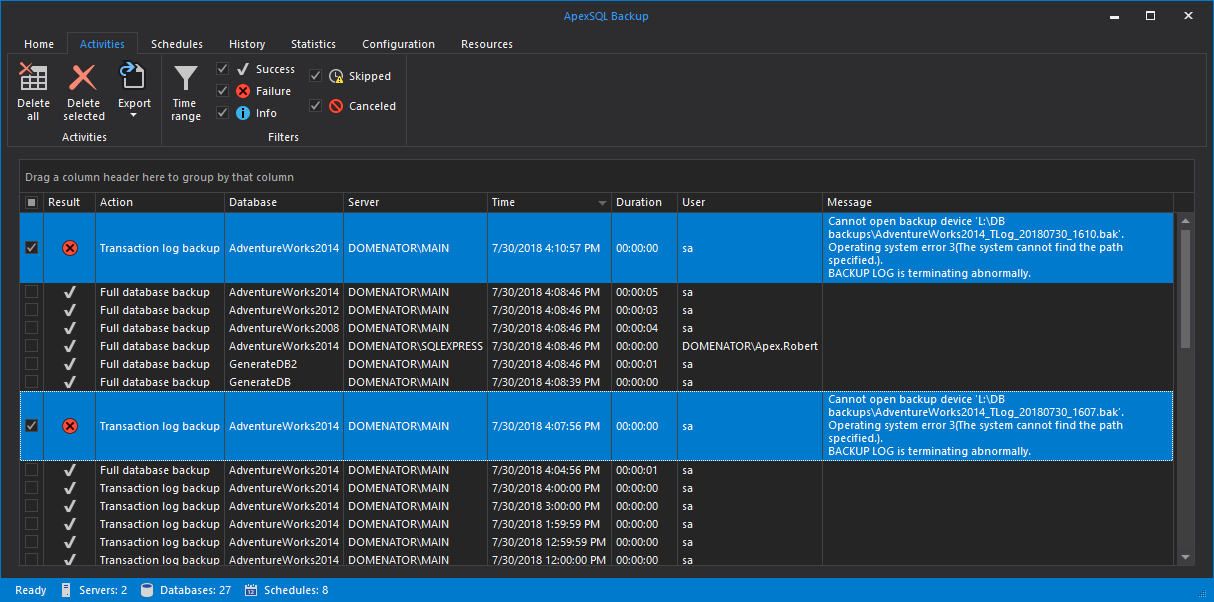
The activities tab, the central dashboard to view the job activities performed through ApexSQL Backup.
The message column gives user-friendly information, which is helpful in troubleshooting the backup jobs. The failures for another transaction log backup job are resulted by the inaccessible disk drive, as seen bellow.
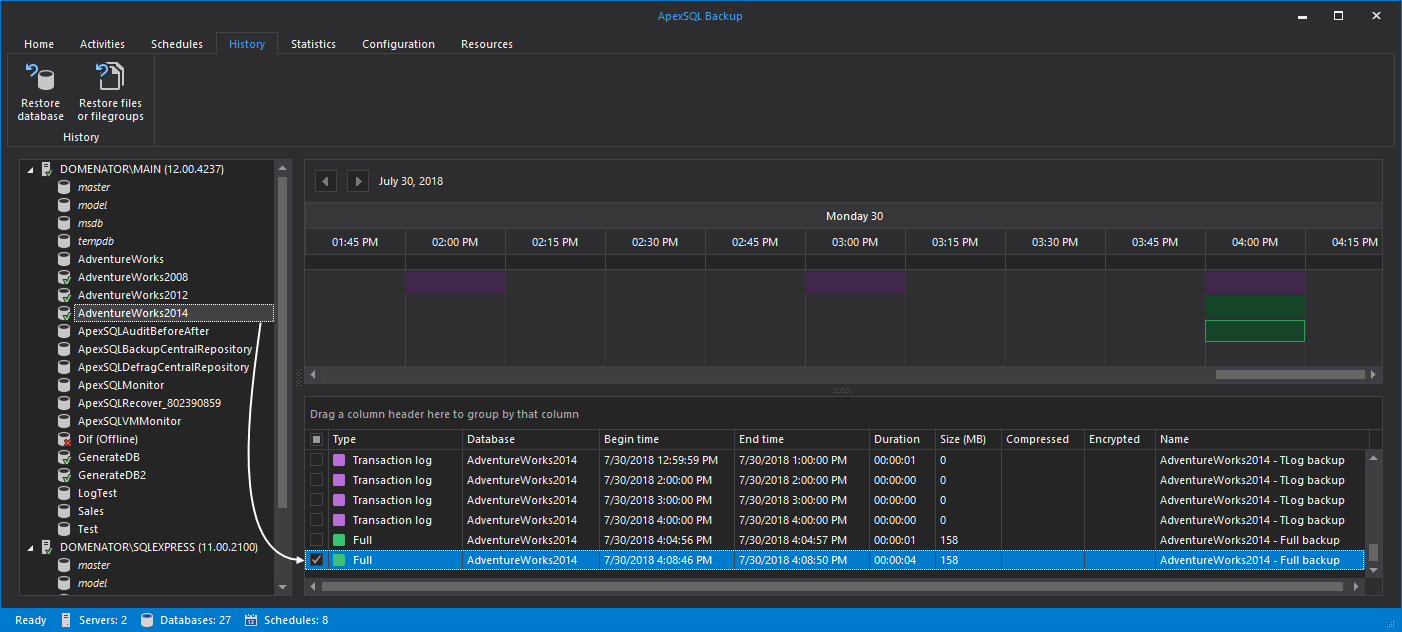
The History tab shows the backup history for the database selected from the Server pane on the left.
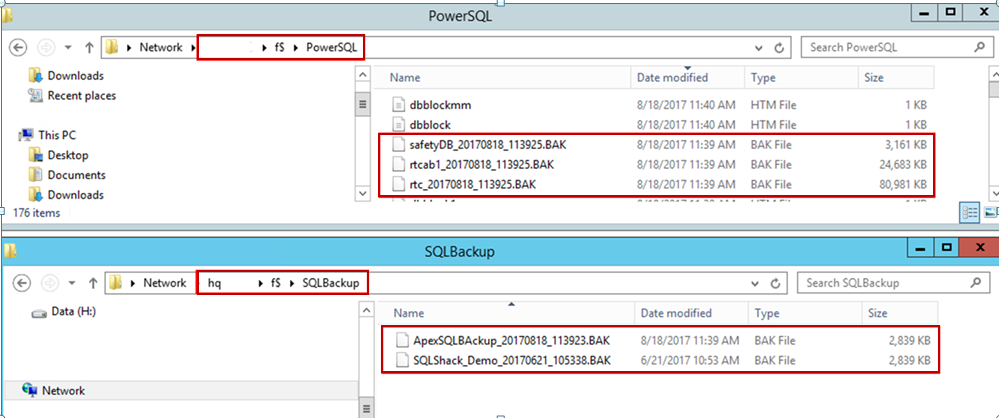
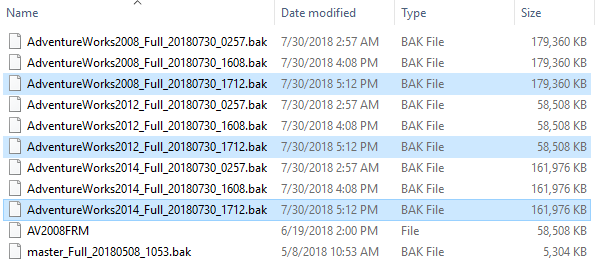
Let us now check for the backup files that got created in the folder we specified as the backup path. We can easily recognize the backup files by their custom filenames. The creation date and time are also available. Notice the file names marked in red.
Also, here’s the summary email notification (Success and Failure)

Wrapping Up
In an environment that relies on a SQL Server backup database script, or a managed native backup methodology, one could try using PowerShell scripts using SMO. We also saw how to backup SQL Server databases automatically using scripts. PowerShell scripts are mostly sequential in nature, unless they are enhanced in order to run parallel processes. However, the latter takes significant effort to define and configure. ApexSQL Backup makes managing these processes much simpler because of its built-in options to handle these tasks in a more efficient manner.References
Appendix (A)
Function Get-SQLDBBackup
{
 param (

        [Parameter (Mandatory=$true,Position=0)][String]$SQLServer,
        [Parameter(Mandatory=$true,Position=1)][String]$BackupDirectory,
        [Parameter(Mandatory=$true,Position=2)][String]$dbList,
        [Parameter(Mandatory=$true,Position=3)][int]$retention,
        [Parameter(Mandatory=$true,Position=3)][String]$Mail)

#loading SMO library

[System.Reflection.Assembly]::LoadWithPartialName("Microsoft.SqlServer.SMO") | Out-Null
[System.Reflection.Assembly]::LoadWithPartialName("Microsoft.SqlServer.SmoExtended") | Out-Null
[System.Reflection.Assembly]::LoadWithPartialName("Microsoft.SqlServer.ConnectionInfo") | Out-Null
[System.Reflection.Assembly]::LoadWithPartialName("Microsoft.SqlServer.SmoEnum") | Out-Null


# Setting the backup data in yyyyMMdd_HHmmss that is 20170619_130939

$BackupDate = get-date -format yyyyMMdd_HHmmss

Function sendEmail

 {
param($from,$to,$subject,$smtpServer)
[string]$recipients="$to"
$body = New-Object System.Net.Mail.MailMessage $from, $recipients, $subject, $body
$smtpServer = $smtpServer
$smtp = new-object Net.Mail.SmtpClient($smtpServer)
$smtp.Send($body)

 }


#Define the SMO class library

$Server = new-object ("Microsoft.SqlServer.Management.Smo.Server") $SQLServer
#Iterating the SQL Server databases of a given instance

foreach ($Database in $Server.databases)
    {
        # Teh
        foreach($db in $DbList.split(","))
        {
            if($Database.Name -eq $db)
            {
                $DatabaseName = $Database.Name

                $DatabaseBackup = new-object ("Microsoft.SqlServer.Management.Smo.Backup")
                $DatabaseBackup.Action = "Database"
                $DatabaseBackup.Database = $DatabaseName
                #Set the directory for backup location
                $BackupFileName=$BackupDirectory + "\" + $DatabaseName + "_" + $BackupDate + ".BAK"
                #write-host $BackupFileName
                $DatabaseBackup.Devices.AddDevice($BackupFileName, "File")

                 try
                   {
                   Write-Progress -Activity "Please wait! Backing up SQL databases... " -Status "Processing:" -CurrentOperation "Currently processing:  $DatabaseName"
                   $DatabaseBackup.SqlBackup($Server)
                   $body=@"
Notification that a $DatabaseName is backed up! successfully with date and time stamp $BackupDate
"@
                    }
                   catch
                   {
                   $body=@"
Notification that a $DatabaseName is backed failed! with an error message $_.Exception.Message
"@
  }

                write-host $status

                if ($Mail ='Yes') {

                  sendEmail -To "pjayaram@sqlshack.com" -Subject " $SQLServer -> $DatabaseName Backup Status" `
                   -From "pjayaram@sqlshack.com" -Body $body  `
                   -smtpServer "hqmail.abc.com"

                    }
                # Preparing the UNC path for the database backup file handling
                # fetching the drive letter. First argument is that starting position in the string, and the second is the length of the substring, starting at that position.
                $drive=$BackupFileName.substring(0,1)
                $len=$BackupDirectory.length
                #write-host $len
                #Selecting the string portion of a directory that is fetching the string starting from the character posittion
                $path=$BackupDirectory.substring(3,$len-3)
                #write-host \\$SQLServer\$drive$\$path
                # Listing the files which is older than 3 minutes in this caseon a server. It can be local or remote location
                $file=get-ChildItem \\$SQLServer\$drive$\$path -recurse -Filter $DatabaseName*.bak | Select-object LastWriteTime,directoryname,name |where-object {$_.LastWriteTime -lt [System.DateTime]::Now.Addminutes(-$rentention)}
                #Iterating each file and remove the file with remove-item cmdlet
                foreach($f in $file)
                {
                $filename=$f.directoryname+'\'+$f.name
                write-host 'File deleted' $filename
                remove-item $filename -Force
                }
            #$DatabaseBackup | select LogicalName, Type, Size, PhysicalName | Format-Table -AutoSize
            }
        }
    }
}

 Get-SQLDBBackup -SQLServer HQDBT01 -BackupDirectory f:\SQLBackup -dbList "SQLShack_Demo,ApexSQLBackup" -rentention 3 -Mail Yes
 Get-SQLDBBackup -SQLServer HQDBSP18 -BackupDirectory f:\PowerSQL -dbList "SafetyDB,rtc,rtcab1" -rentention 3 -Mail Yes

No comments:
Post a Comment